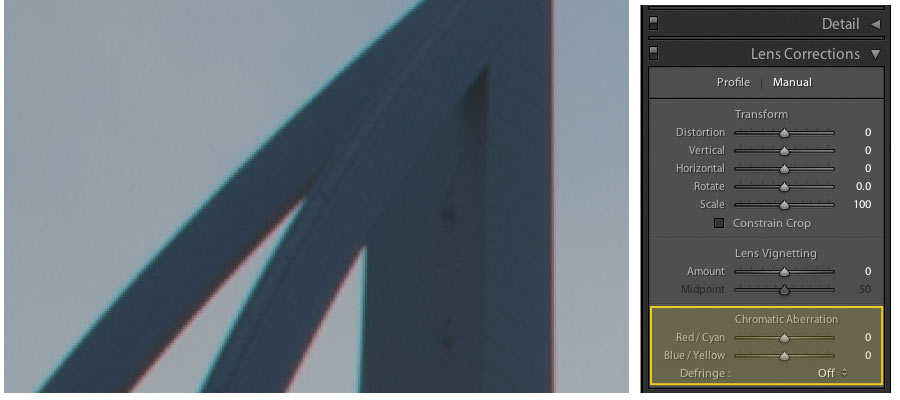
So your photos have been Chromatically Aberrated?
Damn. That sucks….
So, where the crap do Chromatic Aberrations come from?
Simple. Gnomes.
Not only do these pesky little buggers steal underpants, come to find out they live inside camera lenses and shit cyan and magenta. This is what’s called “color fringing” or “chromatic abberration” and occurs most often around edges with high contrast.
I know! I was just as shocked as you. Not only is it completely disgusting and unsanitary, chromatic aberration can also totally ruin your shot, especially when working with HDR Photography.
Anyway, if you don’t have any cans of industrial strength raid handy, Lightroom has the next best thing for combating the chromatic aberrations these little bastards leave behind.
Select your image in Lightroom and click on the Develop Tab.

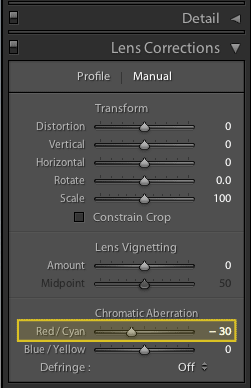
Next, scroll down to the Lens Correction Options and notice the sliders for “Chromatic Aberration”
Now you just need to identify what type of Gnome Shit (color fringing / chromatic aberrations) got on your photo. Zoom into an edge with high contrast and see if it’s Red/Cyan or Blue/Yellow. 9 times out of 10 it’s going to be Red/Cyan. It has something to do with the standard Gnome diet.


Next, adjust the sliders until most of the gnome shit (color fringing) disappears.
If you have multiple exposure brackets, make sure to give each one the exact same settings.
Lightroom has to shift around the color plates slightly to correct the fringing. So, if you have various settings across multiple brackets, it could cause alignment problems when you process the final HDR Image.


