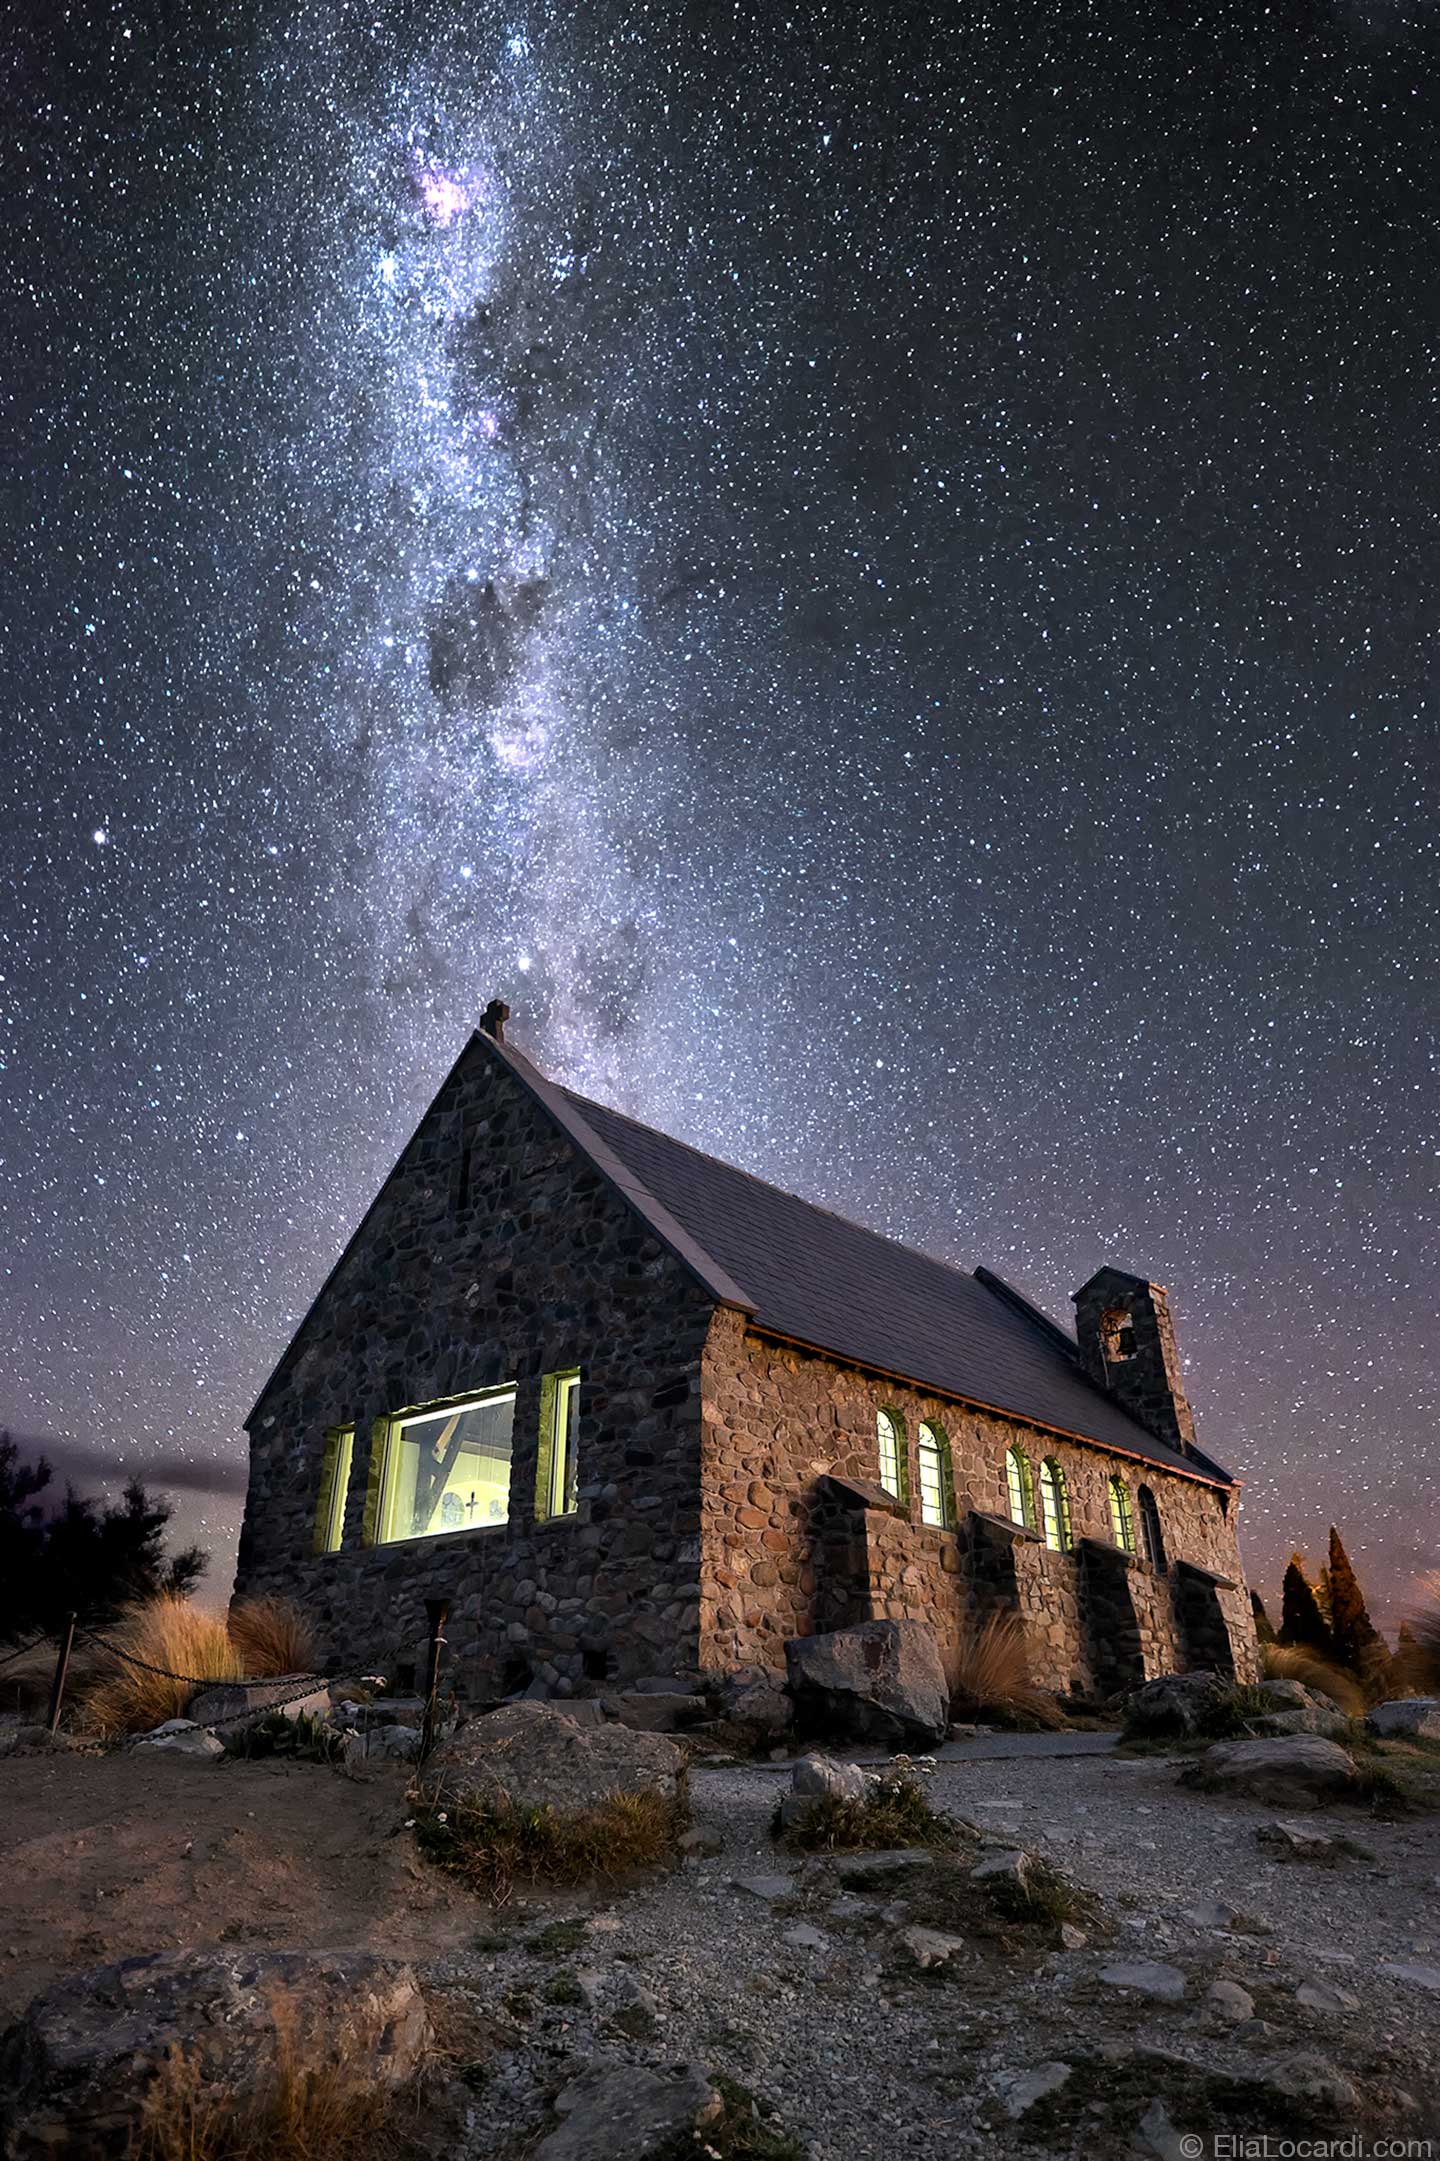
Most of us are familiar with astrophotography these days as we continue to see more and more photos of the Milky Way and night sky all over the internet and social media. Similarly, star trails being incorporated into night photography has become very popular as well.
Personally, I’m a huge fan of astrophotography and always enjoy trying to incorporate star trails into my own work. Though slightly technical, ‘star stacking’ it’s not a very difficult thing to master in photoshop. Essentially, after you shoot multiple and consecutive exposures of the night sky (I like to shoot around 100-200, 30 second exposures), you simply load them into Photoshop using File / Script / ‘Load files into stack.’
After that, you select all the layers at once and change their blending mode to ‘lighten,’ and boom, just like that, the stars all stack together as trails.
My personal preference at this point, is to create what I call a “tail fade.” That’s where the trails look like comets because I change their opacity consecutively from 0 – 100. Some prefer having solid trails but I consider tail fades to be a cool style choice.
Perhaps my favorite thing about shooting star trails is you can achieve a totally different look dependent simply on which direction you happen to be facing, and small variations to your positioning and angle can yield a completely different feel and style to the final shot.
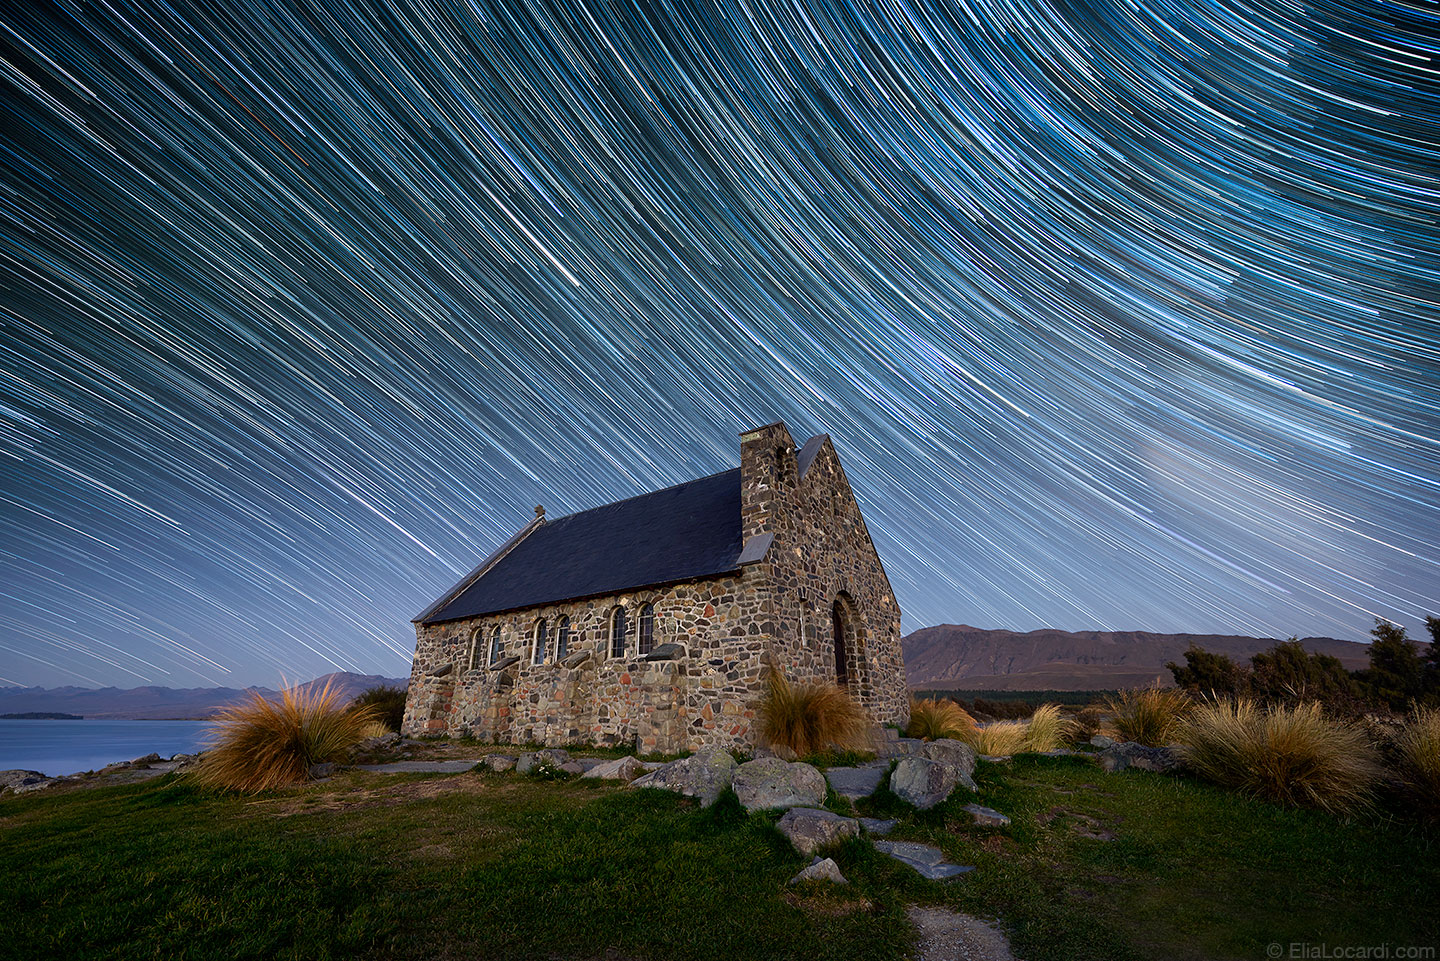
In Photographing The World: Cityscape, Astrophotography, and ADV Post-processing, I specifically wanted to teach how to create stunning star trails from start to finish. This is one of the final shots that I teach in the tutorial series and I photograph it while facing almost exactly on the Celestial Equator.
What is The Celestial Equator?
Essentially, the Celestial Equator follows Earth’s equator, so if you’re facing east or west, you’ll tend to have the look of stars falling across the sky. In the photo from New Zealand above, we were shooting in a dark sky reserve during a new moon so there was no light pollution, meaning that I could see a sky full of stars. In addition, I was shooting at a very wide angle so at each corner of the image, you can see the rotation points of the stars begin to change.
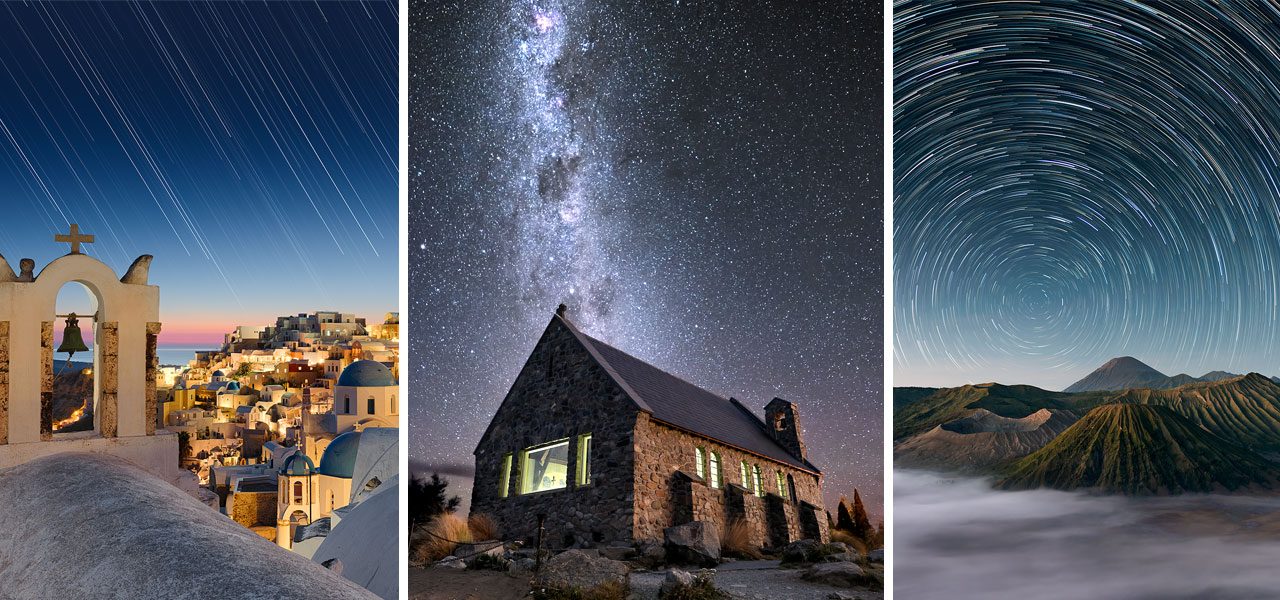
In other situations outside of nature and dark sky reserves, such as cityscapes, villages, or towns, there is naturally going to be a bit more light pollution. It’s still very possible to create star trails but with that extra ambient light in the sky, there will just be less stars in frame. As you can see with one of my classic star trails photos from the Island of Santorini in Greece, while I’m still shooting towards the Celestial Equator, there are far less stars visible in the sky. Regardless of the light pollution from the city, it gave them a sort of falling star look that I really like.
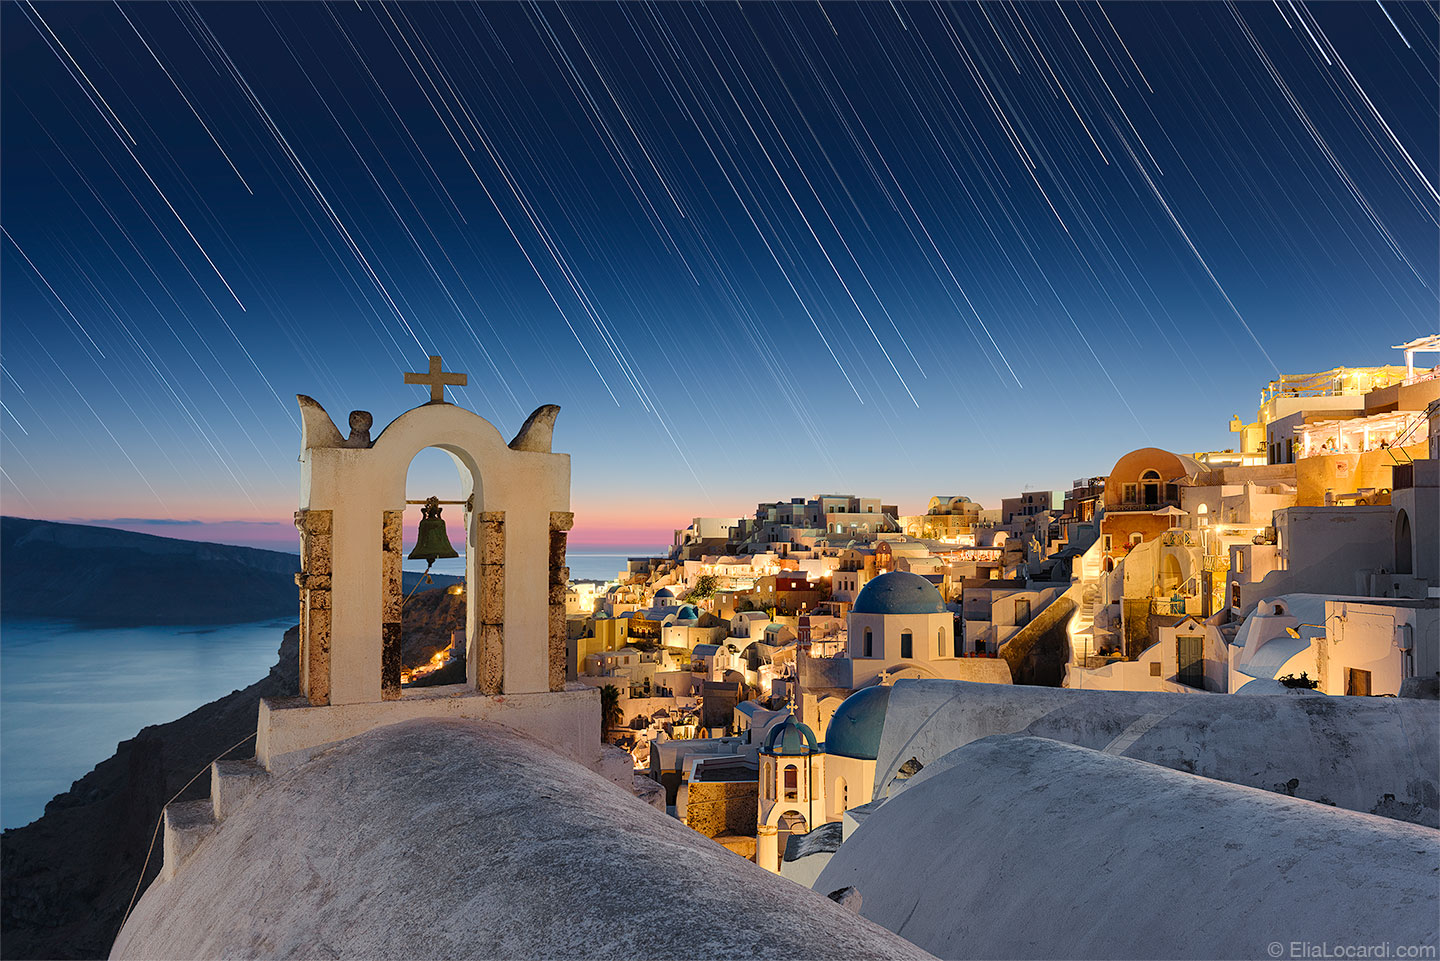
As the stars dance above the enchanting town of Oia Santorini, the island paradise of the Aegean Sea.
What is The Celestial Pole?
The Celestial Pole is just as easy to explain as the Celestial Equator because it’s based on the axis of the Earth’s rotation. So, essentially, if you face north or south, you’ll end up seeing the center of the earth’s rotation in your frame. There’s a bit more complexity to finding the exact location and elevation of the pole, but that’s the simple explanation. 🙂
Something else to keep in mind is that regardless of North or South, many people call this The Polaris, and that’s due to the fact that the star Polaris — commonly known as the north star — is only a few degrees off of the center of the rotation. So if you can see the north star in your shot, than you should be able to get the rotational effect in your photo. Most people have settled on just calling the Celestial Pole the Polaris.
In the shot below, I had carefully calculated the position of the Celestial Pole before visiting this spot in Indonesia. Luckily I had a crystal clear sky the entire night and I was able to capture the Celestial Pole in all of it’s glory. Obviously, the unique landscape helped as well!
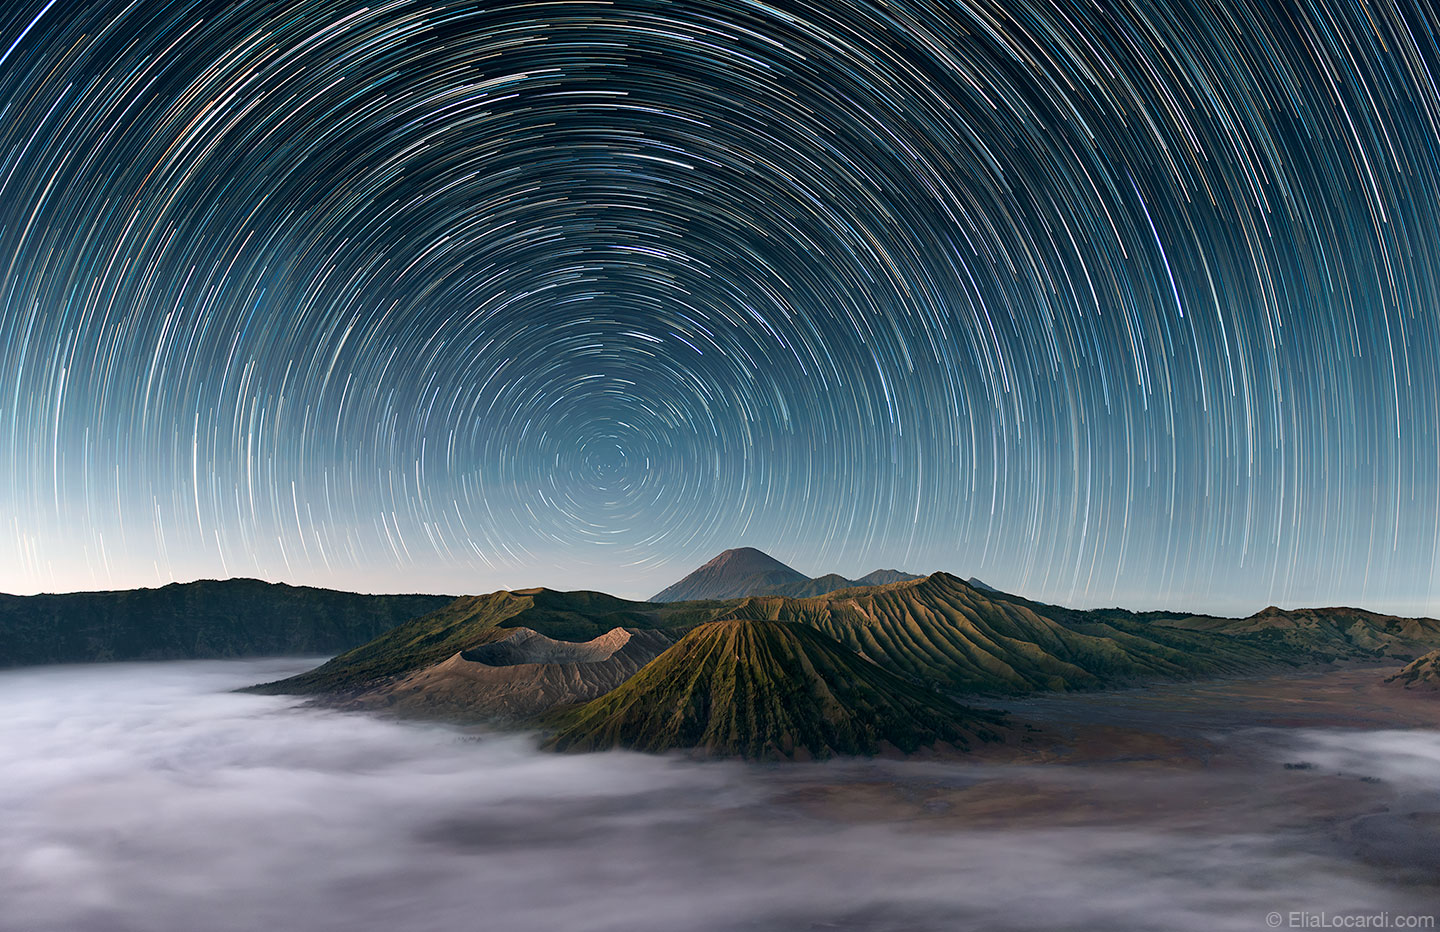
The stars dance above the extraordinary Mt Bromo Indonesia as the morning fog rolls through the caldera.
Now that you know a little more about how to give your star trail photography various looks depending on your position and camera orientation, it’s time to get out there and practice. If you’re interested in learning not only more about shooting stars, but also how to post-process your shots and make them extremely vibrant, sharp and beautiful, check out my tutorial series that includes includes the entire process from in the field to processing in the studio.

