This idea that HDR processing is a one button procedure in Photomatix is pure and ridiculous nonsense. Sure, there are some one button wonder HDR apps, such as the Iphone integration, but if I break my photographic process into pure numbers and statistics, HDR processing barely makes up 10% of my total work flow.
Recently, I’ve had some pretty funny debates about it with the people I affectionately refer to as: “HDR Haters.” Check out some of the more memorable nonsense in a new section I like to call, “The Great HDR Debate.”
Import Settings
Ok, now let’s say that you’ve already exported your 16 bit Tiff files, eliminated any mis-alignment issues, and have imported your exposure brackets into Photomatix Pro.
If not, check out the Hand Held HDR Tutorial Part 2. It covers the import options in Photomatix Pro.
Correcting Ghosting
If you have any moving elements such as cars or people. Photomatix allows you to isolate and correct the ghosting. It’s pretty simple.
First, when initially loading the Exposure Brackets, select “Reduce Ghosting Artifacts,” and “Semi-Manual. Press “Preprocess””

Next, draw selections around the blurry (ghosted) elements. After you draw a selection, right click it and select, “Mark Selection as Ghosted Area.”

Press Preview DeGhosting to see the result. If you like it, click ok. If not, return to selection mode and try again.
Note that this doesn’t always work. If it doesn’t, I just blend in elements from single brackets myself in photoshop.
Basic Photomatix Processing
Now, if I told you that I only use a couple sliders in Photomatix, would you believe me? Well, it’s true.
First things first. SET THE PRESETS TO DEFAULT. Did I make that seem important enough? 😉
Next, The only options that I use in Photomatix are the following 3, in this order:
Strength: I have always set this to 100%. Period.
Smoothing: Toggle this option to remove any halo effects. Never go below Zero and Even though the max is 10, try to use it sparingly. Only increase the amount until the halos go away.
Micro Contrast: This is actually a cool slider. If you slide it forward it shifts your histogram around and makes everything darker. Slide it back and everything gets lighter. I find myself, with most images, landing somewhere between 0 and 2.

Next, I may tweak the white point and black point a hair. It depends on what kind of mood I’m in. It’s not really that important though, since we can always clamp the levels in Photoshop.
Really that’s the whole of it. I use options in Photomatix only to prep images for Photoshop. I don’t advise adjusting things like saturation and contrast in Photomatix because:
- It’s a linear process, meaning that once you press the “process” button, you’re stuck with what you’ve got.
- Not only is Photoshop a far more advanced tool for color correction, but it’s also non linear. With adjustment layers you can tweak settings and change them over and over again without flattening the image or baking those adjustments in.
Obviously, everyone has their own method here. If you want to screw around with the color saturation settings inside of Photomatix, go for it. Whatever floats your boat. Just know that every time you over cook an HDR image, little baby kittens die.
After you’re happy with the result, click the “Process Button” and Save the image as a 16 bit Tiff.
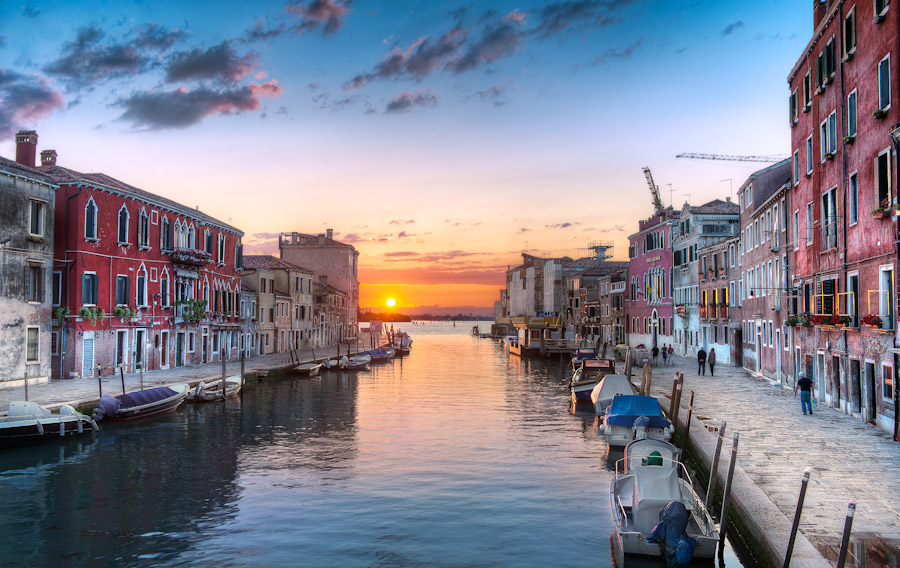
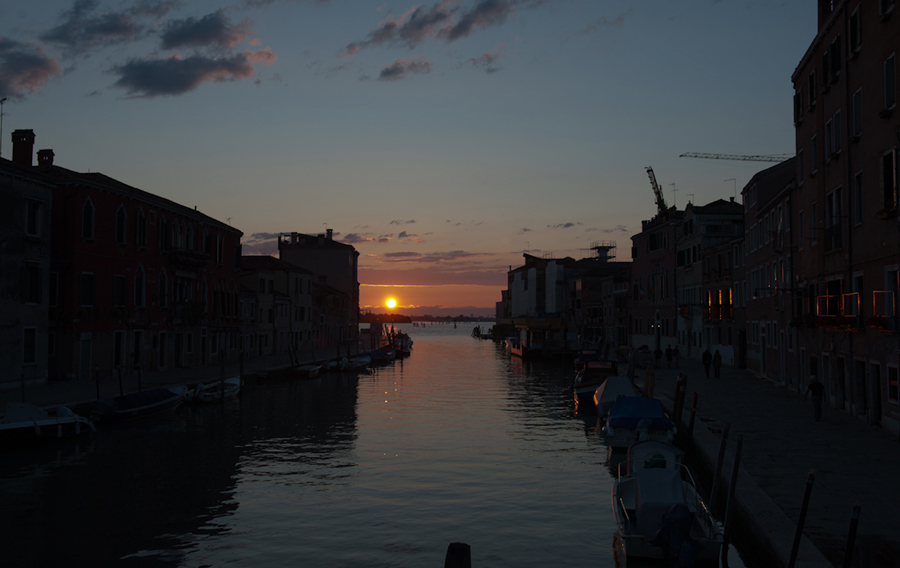
So, all in all, so far we’ve converted our exposure brackets into 1 HDR image. The following Before and After Comparison highlights the difference. It’s pretty damn dramatic.
Compare Single Exposure & Photomatix HDR Result
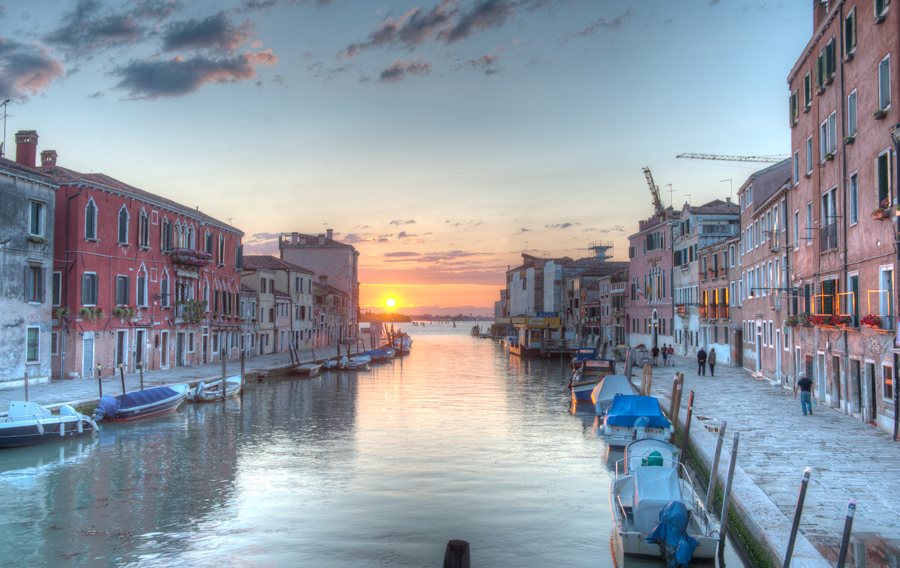
Compare Photomatix HDR Result & Final Image