HEADS UP – THIS CONTENT IS OLD.
First of all, lets talk about hardware and software. In order to do this right you are going to need a combination of both.
Photography in general can be a very expensive habit, especially when you’re just starting out and building your kit. Factoring in the cost of a good DSLR camera with lenses can be overwhelming at first if your on a budget. Try to buy pieces of photo gear spread out over time, starting with the most important pieces, a good DSLR Camera Body and at least one decent lens. Little by little, as you can, add more.
Personally, I’ve been shooting using Nikon Hardware for years. During my years teaching we also used Canon cameras and lenses in the classroom. Both companies produce top notch gear and are fully capable of getting the job done.
HDR Photography Hardware
So have you managed to hide enough money from your spouse yet?…GREAT! Here’s The Gear You Need.
Recommended Camera Features:
Bracketing & AEB (Auto Exposure Bracketing)
Since the main focus of the game is going to be HDR, make sure that your camera has a bracketing feature. Some standard DSLR Cameras can bracket up to three (3) exposures while professional grade DSLRs can bracket up to nine (9). Three bracketed exposures can usually produce a stunning HDR photograph, so it’s not always necessary to spend big bucks on the upgraded bracketing feature.
RAW Image File Format
Raw digital photography has a wider dynamic range or color gamut than the eventual final image format, such as a JPEG. Raw images also preserve most of the information of the captured photo and save, with minimum loss of information, the data obtained from the camera’s sensor. In other words: Raw = Higher Dynamic Range. Period. Thankfully nearly all DSLR Cameras have this feature.
Low Noise and ISO Range
When shooting for HDR it’s important to shoot at the lowest ISO possible. The higher the ISO, the more noise or grain will be in the image. Since HDR Processing always produces extra grain, brackets shot at high ISO ranges can look very poor after HDR processing. Some Cameras have improved ISO ranges that allow you to shoot at higher ISOs without losing quality to film grain. Pay close attention to these details when researching what camera is right for you.
What Camera?
Since I’m most familiar with Nikon Cameras, this list is comprised of… well, Nikon cameras. The following are listed in order from Beginner to Professional (conveniently enough, also from lowest to highest price.
Entry Level & DX Format:
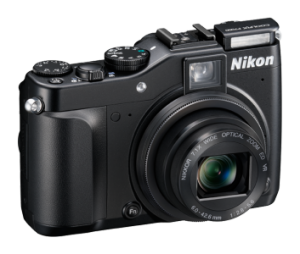
Nikon Coolpix P7000 (Most Budget Friendly – It will get the job done):
10.1 Megapixels — ISO sensitivity from 200 to 3200
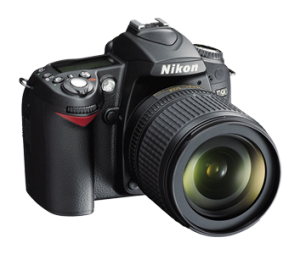
Nikon D90:
12.3 Megapixels — Brackets: 2 or 3 frames in steps of 1/3, 1/2, 2/3 or 1 EV — ISO sensitivity from 200 to 3200
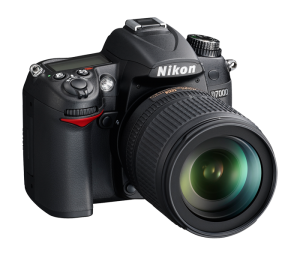
Nikon D7000:
16.2 Megapixels — Brackets: 2 to 3 frames in steps of 1/3, 1/2, 2/3, 1 or 2 EV — Dynamic ISO range from 100 to 6400 (Expandable to 25,600 in “Hi2” Mode)
Professional Level & FX Format
(FX Format captures a higher dynamic range than DX)
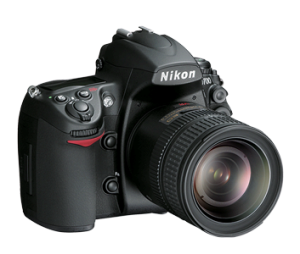
Nikon D700:
12.1 Megapixels – Brackets: From 2 to 9 exposures in increments of 1/3, 1/2, 2/3 or 1 EV — Super low-noise performance from 200-6400 ISO (added versatility of Lo-1 (100 ISO) Hi-1 (12,800 ISO) and Hi-2 (25,600 ISO)).
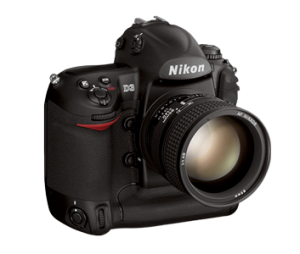
Nikon D3:
Basically the same specs as the D700 with a full size body. You do get 100% viewfinder coverage (D700 has 95%), A larger battery that produces a higher frame rate, and dual memory card slots.
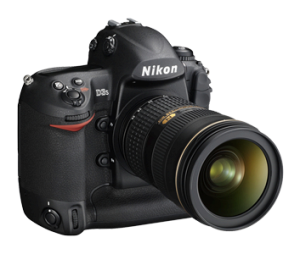
Nikon D3s:
12.1 Megapixels – Brackets: From 2 to 9 exposures in increments of 1/3, 1/2, 2/3 or 1 EV — Low Noise ISO Sensitivity from 200 to 12,800 (Renowned low-noise performance at 12,800, plus expanded settings to an astounding ISO 102,400 (equivalent) and ISO 100 (equivalent)). This doubles the ISO sensitivity of the D3
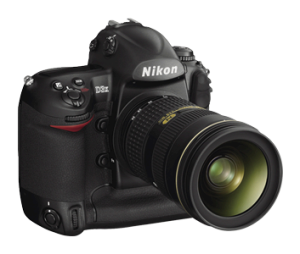
Nikon D3x:
24.5 Megapixels – Brackets: From 2 to 9 exposures in increments of 1/3, 1/2, 2/3 or 1 EV — Low noise ISO sensitivity from 100 to 1600 (Added ISO settings of Lo-1 (ISO 50 equivalent), Hi-1 (ISO 3200 equivalent) and Hi-2 (ISO 6400 equivalent)
What Lens you ask?
Some Lens Requirements:
Lenses are expensive. Very Expensive. Thankfully they are one time investments. If you treat them well and keep them in good condition you can usually recoup most of their value when reselling them.
An important thing to consider when selecting lenses for HDR Photography is the “Maximum Aperture.” The lower this magical number, the higher your Shutter Speed will be. It also allows shooting at lower ISOs.
Fixed Lenses VS Zoom Lenses:
The basic idea here is that a Fixed Lens usually has a Higher Maximum Aperture then that of a Zoom Lens (most Zoom Lenses have a range). The downside is that you cant zoom; at all. You’ll have to get used to repositioning yourself instead of greasing the lens. Another perk is better image optics. Though not always the case, fixed lenses can sometimes produce superior results at a lower price.
Zoom Lenses come in a variety of flavors ranging from: wide angle, mid-range, all around, and telephoto. These lenses offer the most freedom and flexibility while shooting. The downside is the Maximum Aperture. Most of these zoom lenses have ranges, for example, my favorite all around lens, The AF-S DX NIKKOR 18-200mm. This lens has a maximum aperture range of f/3.5-5.6. Remember, the higher that number, the longer the exposure. You can find zoom lenses with fixed maximum apertures but they always cost a pretty penny.
DX vs FX Lenses:
If you own a DX Camera and plan to continue purchasing DX Cameras, buy DX Lenses. They are cheaper than FX Lenses and are specifically engineered for DX Camera Bodies.
If you own a DX Camera Body and plan to upgrade to a FX Camera Body later, then you should start investing in FX lenses now. However, if you don’t, you can usually sell good condition used lenses on Ebay or Craigslist to recoup some of the cost. If you own a FX Camera body you must have FX lenses. DX Lenses only work in Crop Mode.
A few DX Lens Recommendations:
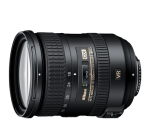
Nikon AF-S DX NIKKOR 18-200mm f/3.5-5.6G ED VR II
This is the best all around and travel lens for a DX Camera.
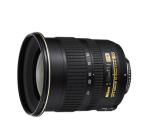 Nikon AF-S DX Zoom-NIKKOR 12-24mm f/4G IF-ED
This is a great wide angle lens and it has a Fixed Maximum Aperture! You can also go even wider with the more affordable AF-S DX NIKKOR 10-24mm f/3.5-4.5G. You also trade the fixed max aperture for a variable.
Nikon AF-S NIKKOR 50mm f/1.4G
This is an FX lens and an absolute MUST HAVE for all Nikon Camera Owners both DX and FX. It has a Fixed Maximum Aperture of f/1.4 and produces stunning images. It’s also very affordable. This is truly a spectacular lens to have in your quiver.
A few FX Lens Recommendations:
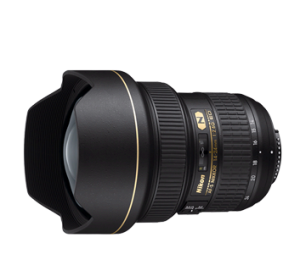
Nikon AF-S NIKKOR 14-24mm f/2.8G ED
Simply WOW! Once you shoot with this lens you’ll understand. This lens in itself is a work of art. It produces stunning imagery and is down right fun to use! It is heavy though; couple it with a Full Frame Body and you got one heavy piece of camera.
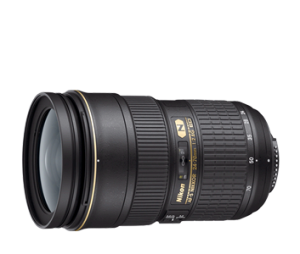
Nikon AF-S NIKKOR 24-70mm f/2.8G ED
This is another amazing piece of optic goodness. Stunning imagery across the board with a Fixed Max Aperture of f/2.8. Many people refer to this as “the bread and butter” lens. I often find myself pulling this lens out of the bag first. It is pricey however but well worth it.
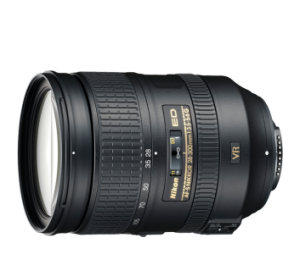
“NEW” Nikon AF-S NIKKOR 28-300mm f/3.5-5.6 ED VR
I haven’t had the pleasure of playing with this lens yet but so far the review are all positive. It’s around $800 less than the 24-70 and packs just as much optic punch. I think this will become the favorite FX all around lens solution.
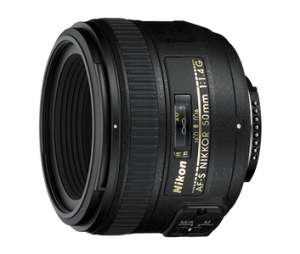
Nikon AF-S NIKKOR 50mm f/1.4G
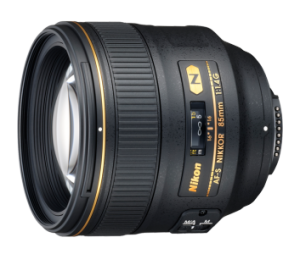
“NEW” Nikon AF-S NIKKOR 85mm f/1.4G
I also haven’t been lucky enough to use one of these yet but it’s predecessor is amazing. This is an ideal lens for portraiture and produces beautiful bokeh.
How about a Tripod?
Yes. Get one! Sturdier and Lighter = Better. Also, try to purchase the legs and head separately. Make sure that the total weight of the tripod head, the camera, and the lens don’t exceed the maximum weight allowance of the tripod legs.
Another thing to consider while traveling is having a lighter set of tripod legs. You can find some legs that have an additional segment allowing you to collapse the tripod further, making it ideal for travel.
HDR Photography Software
Basic Recommendations for Creating HDR Images:
Adobe Photoshop:
Your One Stop Photoshop; arguably the most important tool in photography, design, and image manipulation & processing. Photoshop also has a built in HDR feature that achieves some pretty decent results. If you want to produce stunning imagery or you just want to put your friend’s head on a chicken’s body, this piece of software is an absolute must.
I remember when I took my first Photoshop class in 1999. I came early to class, started Photoshop Version 5, then opened a stock photo, and then uh, crap, buttons and stuff everywhere. I went to the filter menu and selected Distort, Pond Ripple. Instant digital bliss! What is this amazing thing I just discovered? Lets try some more. Filters: Distort, Twirl. Wow! I’m a photoshop master! I wonder what the watercolor effect does. Sweet!
“Class, I’m your teacher Mrs. V. Let’s get started,” announced the teacher. “Photoshop is a wonderful application that opens up a world of creative possablilites. It looks like some of you have already started playing with the interface; and some of you have already found the distort filters.”
“Oh Crap!”
She went on to explain that Photoshop is not about filtering images but It’s about manipulating and sweetening imagery to it’s fullest potential. She also explained that Photoshop is an extremely robust application that covers the tool sets for both graphic design and image processing and through the use of these tools one could go on to do amazing things in the professional world.
“Sounds boring, Like What?”
“Are any of you familiar with Playboy Magazine? (quizzical silence) One of my former student’s is a retouch artist. He’s the one who airbrushes the Playmate Centerfolds.”
“Sold!”
Photomatix Pro:
This is the software I use to process my HDR images. It’s fast; and it’s reliable & cheap. It’s an all around HDR Photography Processing powerhouse that, in my opinion, produces a better result than Adobe Photoshop’s HDR engine.
Adobe Lightroom:
If you are going to be shooting HDR Photography, you are going to have a ton of pictures to sort through. Adobe Lightroom catalogues your image library for streamlined sorting, manipulation, and finishing.
It’s also a direct portal between Photoshop (all Adobe products) and Photomatix Pro. In addition you can quickly create web galleries and upload images directly to facebook, flickr, and smugmug.

