HEADS UP – THIS CONTENT IS OLD.
Importing photos into Adobe® Lightroom
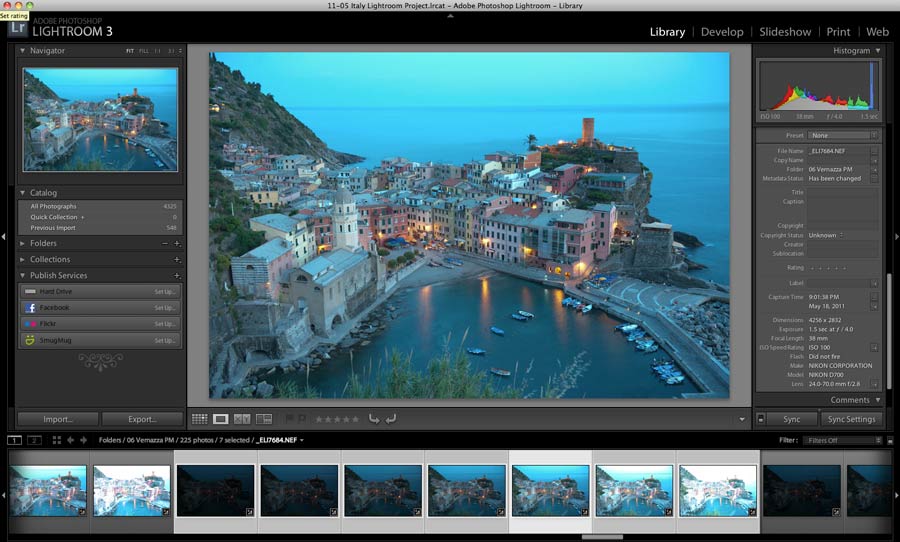
I use Adobe® Lightroom as my complete digital catalogue. Everything I shoot, edit, tweak, destroy, or paint little red hearts on, comes through this program.
Before photos get sent to Photomatix or Photoshop, I use Lightroom to sort, cleanup (if necessary), remove Chromatic Aberration, and Export photos as Tiffs.
If you’ve been using Adobe® Lightroom, you no doubt have developed some sort of nifty work flow for organization. Personally, I use a combination of Selection Sets, Colors, and Voodoo magic. So far it’s worked really well for me but to be honest, the method for organization isn’t really important as long as it works for you.

Once I’ve selected the Scene that I want to work on, I remove any Chromatic Aberration that may be present.
For more detailed info on this subject, visit the Fixing Chromatic Aberration in Adobe® Lightroom Tutorial
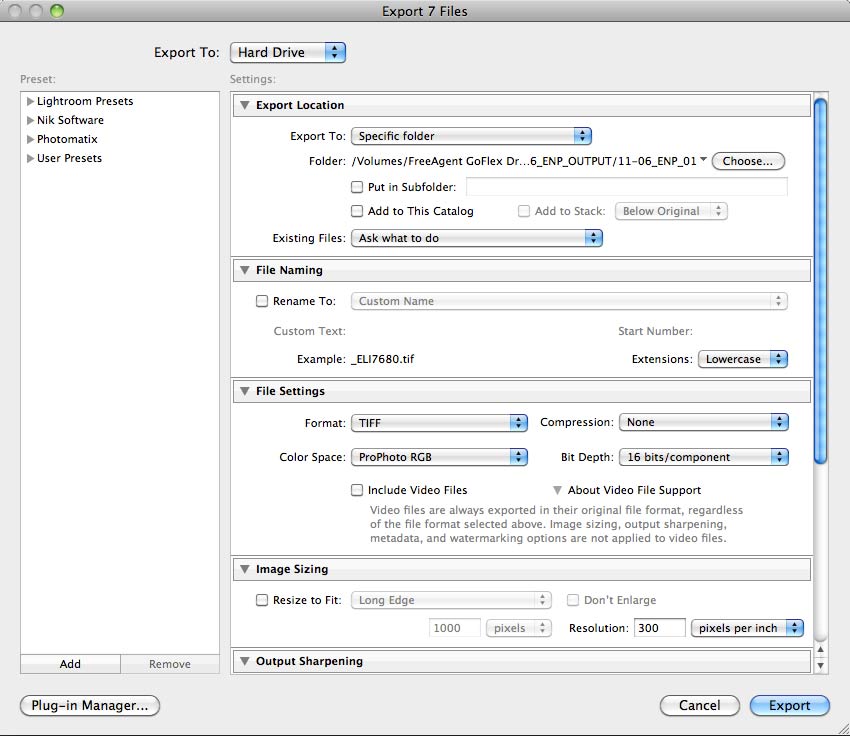
Next, I export all the Exposure Brackets in 16bit Tiff Format (ProPhotoRGB color space).

You don’t have to use Lightroom to make the Tiff files. You can import raw files directly into Photomatix and Photoshop. For my processing, I like it because it puts all the exposure brackets into one place & into one folder. This makes it easier if you need to correct alignment issues (See Handheld HDR Tutorial) or import individual exposures into photoshop.


