Welcome to one of the biggest game changers in mobile photography history as Adobe announces fully integrated raw photo editing in Lightroom Mobile for iOS!
![]()
The first time I ever used an Adobe Product was way back in 1999 when I began working professionally with Adobe Photoshop version 5.0. Of course 17 years ago Photoshop was a completely different program. Since then Adobe has continuously refined the digital editing tools they offer–evolving to meet the changing needs of today’s artists and photographers. This latest release of raw support for Adobe Lightroom on iOS mobile is no exception.
The quality of my photography is something that is extremely important to me and since I first began shooting digital, I have been consistently shooting in raw format no matter which camera I happen to be using.
Over the years, my photography workflow has come to rely on being able to precisely post-process raw photos and bring out every bit of color and detail in both the shadows and highlights. I’m able to achieve this thanks to Adobe Photoshop Lightroom, Adobe Camera Raw, and the incredibly powerful camera sensors we have these days that capture and save an extremely wide amount of dynamic range in their raw files.
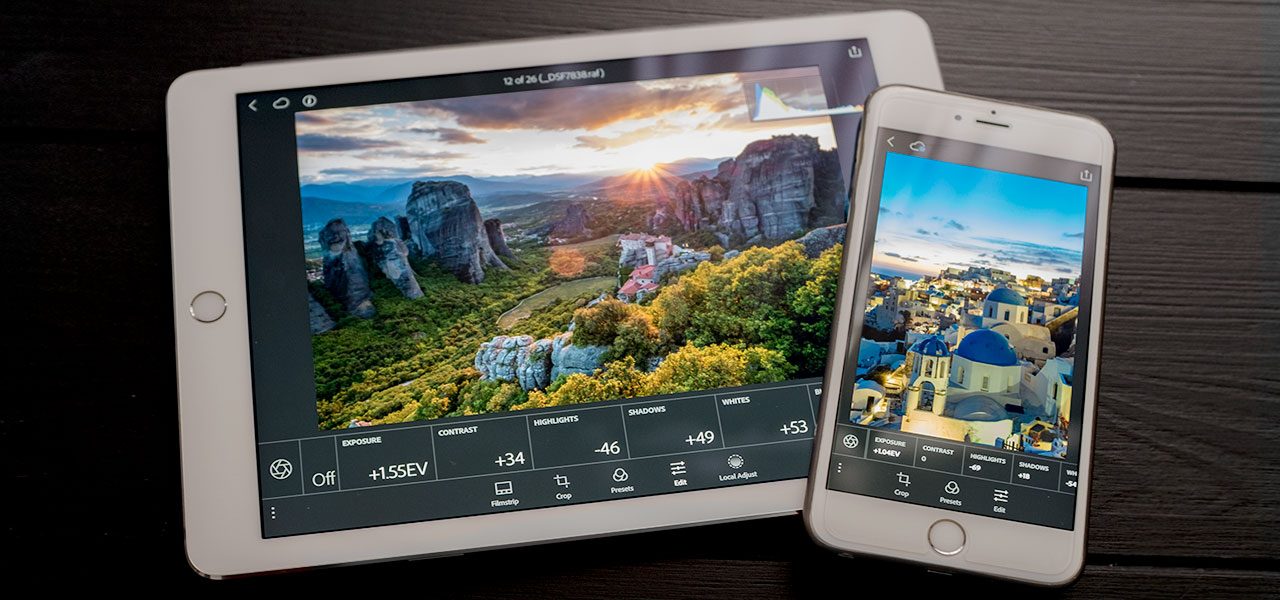
Even though I live a 100% mobile lifestyle, before now I wasn’t able to take advantage of image editing on my mobile devices, because of the lack of raw processing capabilities they offered. Now that Adobe Photoshop Lightroom Mobile has incorporated full camera raw support on iOS, I feel like everything has changed. Now there are no restrictions to when or where I can work on my final images. I can literally edit my raw photos and share them on the fly while I’m out shooting on location, and no matter where I happen to be in the world.
Before this update I would need my Macbook Pro to review and edit my raw photos, now I can do it all on my iPhone or iPad without any loss in image quality. What’s not to love about that!

(Camera: Fujifilm X-T2. Raw photo edited using Adobe Lightroom Mobile.)
Testing Out The New Mobile Tools in Greece
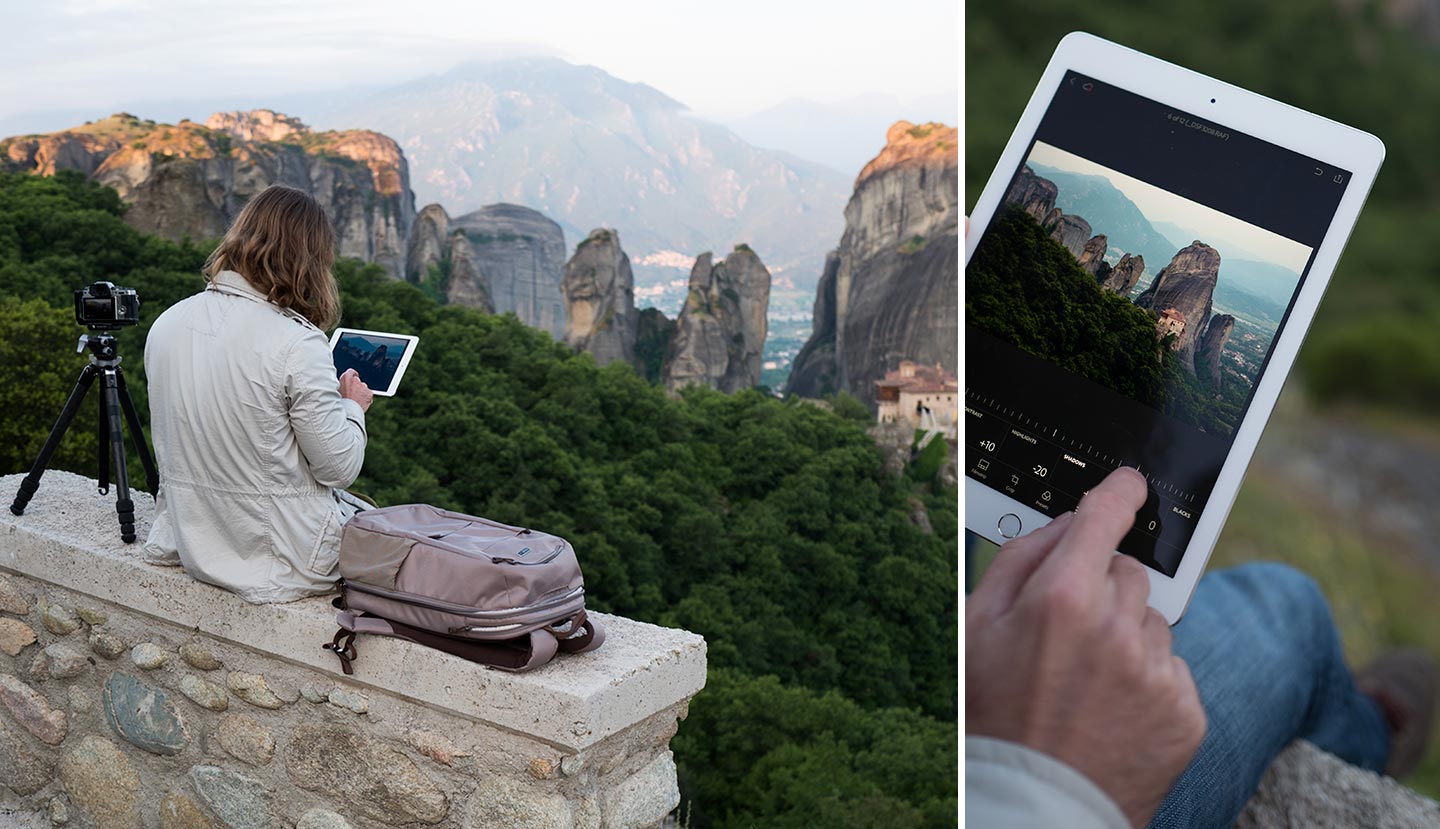
When I was asked to test out the new Adobe Lightroom Mobile for iOS–to see how it would hold up to my on-the-road raw processing workflow–I decided there was only one logical thing to be done to ensure success. Take the project to Greece! 😀
While I am kidding around a little about Greece being the only logical choice, the truth is I knew there were areas in Greece where I could test the mobile tools while being inspired by truly phenomenal landscapes. I wanted to ensure that I’d have the opportunity to capture some beautiful images to edit using the new Photoshop Lightroom Mobile.
During our time in Greece, we also created a video that shares about the way I approach inspiration and photography, and gives a great overview of the power of the new Adobe Photoshop Lightroom raw editing capabilities. It also highlights some of my favorite areas of Greece–Meteora, on the mainland, Santorini and some other less touristed islands in the Cyclades.
Why Shoot Raw Over Jpeg? What’s the big deal?
These days, the majority of cameras have the ability to shoot in both raw and jpeg file formats. So, capturing raw images should be possible, but it will depend on what device you’re using. You may be asking yourself, why shoot in raw? What makes it so much better than shooting in jpeg? To understand the benefits, you need at least a basic grasp of the differences each format offers.
Without getting overly technical, raw image files are essentially uncompressed or unprocessed data captured directly from the digital camera’s sensor. The settings used when the camera captured the image, such as contrast or sharpness, are not applied, but instead are preserved without processing or compression, which offers the ability for these (plus many more settings) to be modified later.
Unlike raw files, jpeg formatted images are processed and compressed with the settings used at the time when the camera captures them–removing the ability to modify any of those settings at a later time. They are basically flattened into a “what you see, is what you get” kind of file format with the ability to only make slight adjustments before compromising the image integrity.
As a result, shooting in raw format gives you much greater flexibility and control over the look and feel of images when making your edits in post-processing. With raw format you can make highly impactful adjustments such as correcting exposure, modifying the highlights and shadows, and even changing white balance.
")
(Camera: Fujifilm X-T2. Raw photo edited using Adobe Lightroom Mobile. Small object removal in Photoshop.)
Welcome To Powerful raw Post-processing On The Go
Now that we’ve got some of the technical “why shoot raw” stuff out of the way, let’s move on to these awesome and powerful new mobile editing tools!
To get started with your iPad or iPhone, all you need to do is shoot your photos and then plug in the Apple SD card adapter. You can also purchase a lightning to USB adapter that allows you to connect directly to your camera and transfer the files to your mobile device. This is great if your camera uses a CF card instead of an SD, or if you don’t want to remove the SD card from your camera.

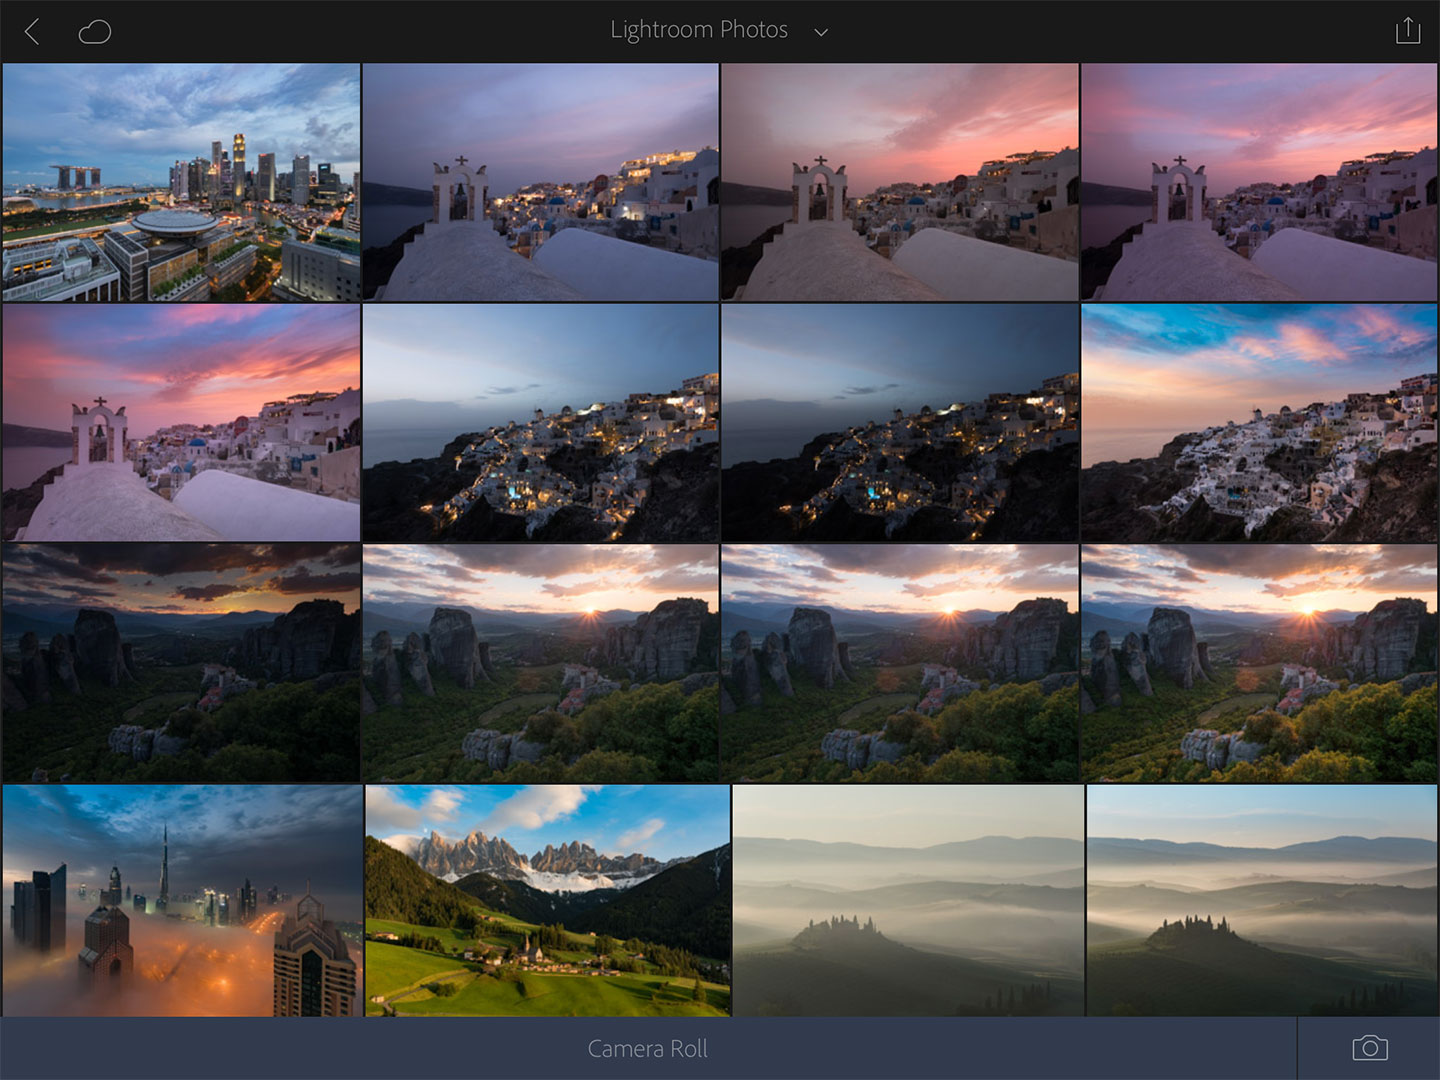
Once the adapter is plugged in, simply import your photos onto your iPad, open Adobe Lightroom Mobile and select which photos you want to import into the application and start editing. You can select a single image, or swipe your finger across multiple images to select as many as you want to import.
Once your files are imported into Adobe Lightroom Mobile, you can begin making many of the same adjustments you can make in the Desktop version. In fact, even though the interface is different, the tools in Lightroom Mobile function the same as the Lightroom for desktop version. At your fingertips—or with an Apple Pencil—you have the same powerful editing functions you’re already used to using, but in an ultra portable package.
Favorite Features of the Latest Adobe Lightroom Mobile
While Adobe Lightroom Mobile doesn’t contain all of the editing features of Lightroom Desktop yet, all of the most important editing features are present. Personally, it only took me a few minutes to get used to the mobile interface and here are some of my favorite features.
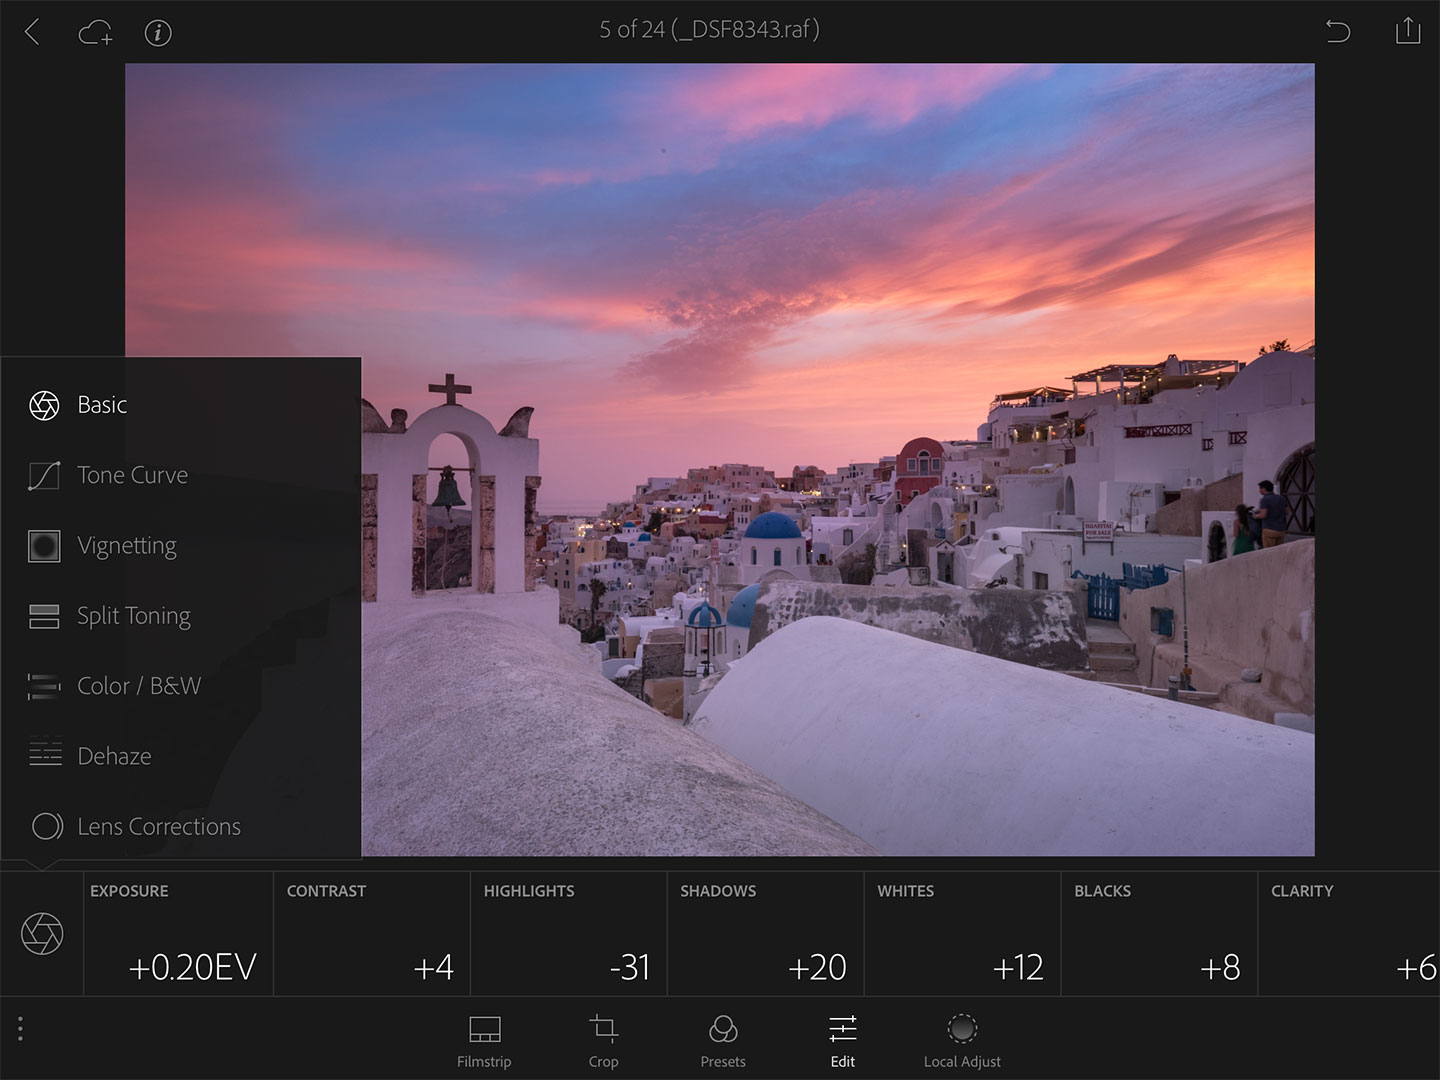
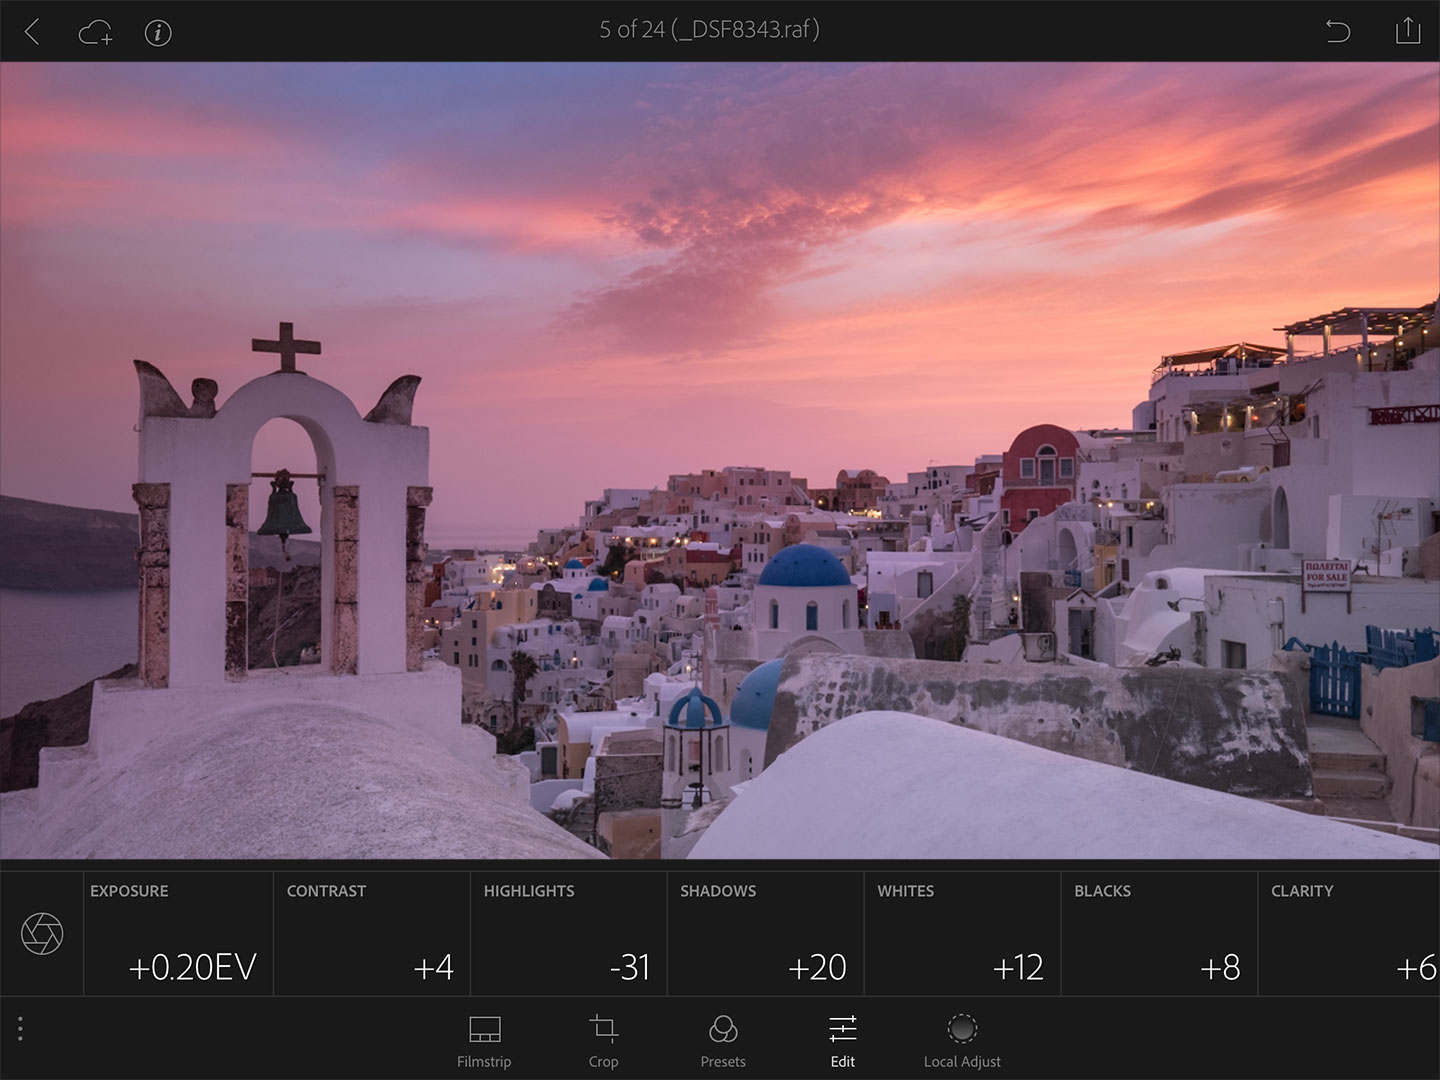
Basic Adjustments
First of all, it’s important to point out that all the basic editing tools are available in Adobe Lightroom Mobile. This includes: White Balance, Tint, Exposure, Contrast, Highlights, Shadows, Whites, Blacks, Clarity, Vibrance, and Saturation.
")
(Camera: Fujifilm X-T2. Raw photo edited using Adobe Lightroom Mobile.)
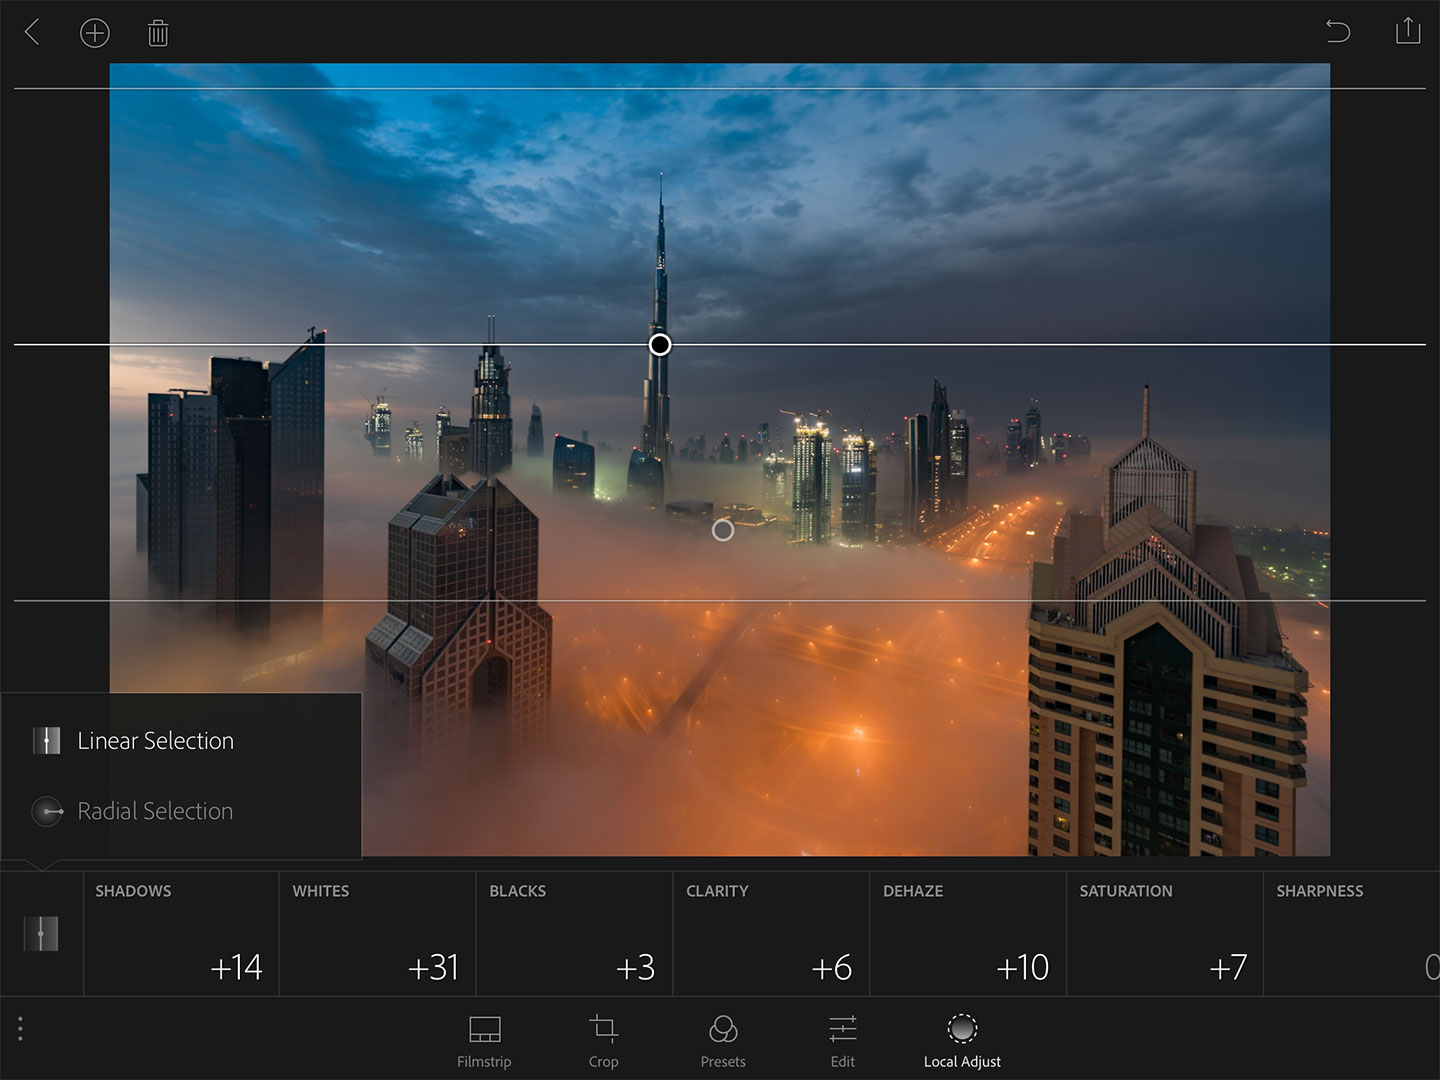
Selective Adjustments
This is probably my favorite feature of Adobe Lightroom Mobile as it allows you to make selective adjustments using two types of selection tools – Linear and Radial. On top of the same controls you have in Basic Adjustments, it adds sliders for Dehaze, Sharpness, Moire, Defringe, and Color Hue.
The Linear Adjustments in Action
The Radial Adjustments in Action
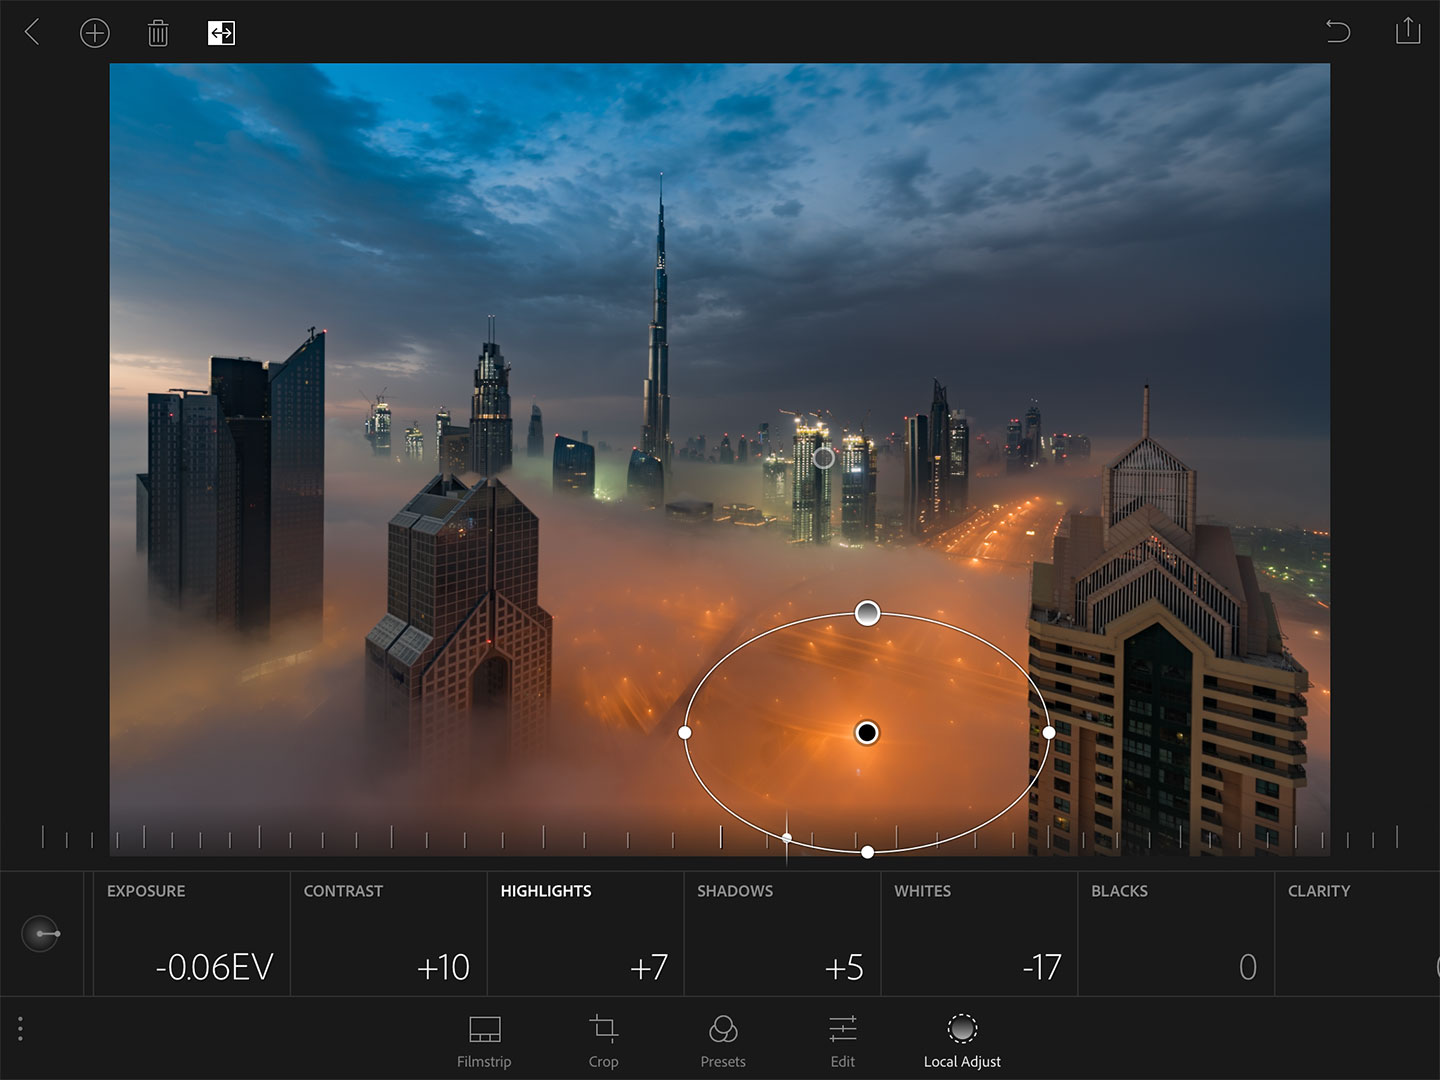

(Camera: Nikon D810. Raw photo edited using Adobe Lightroom Mobile)
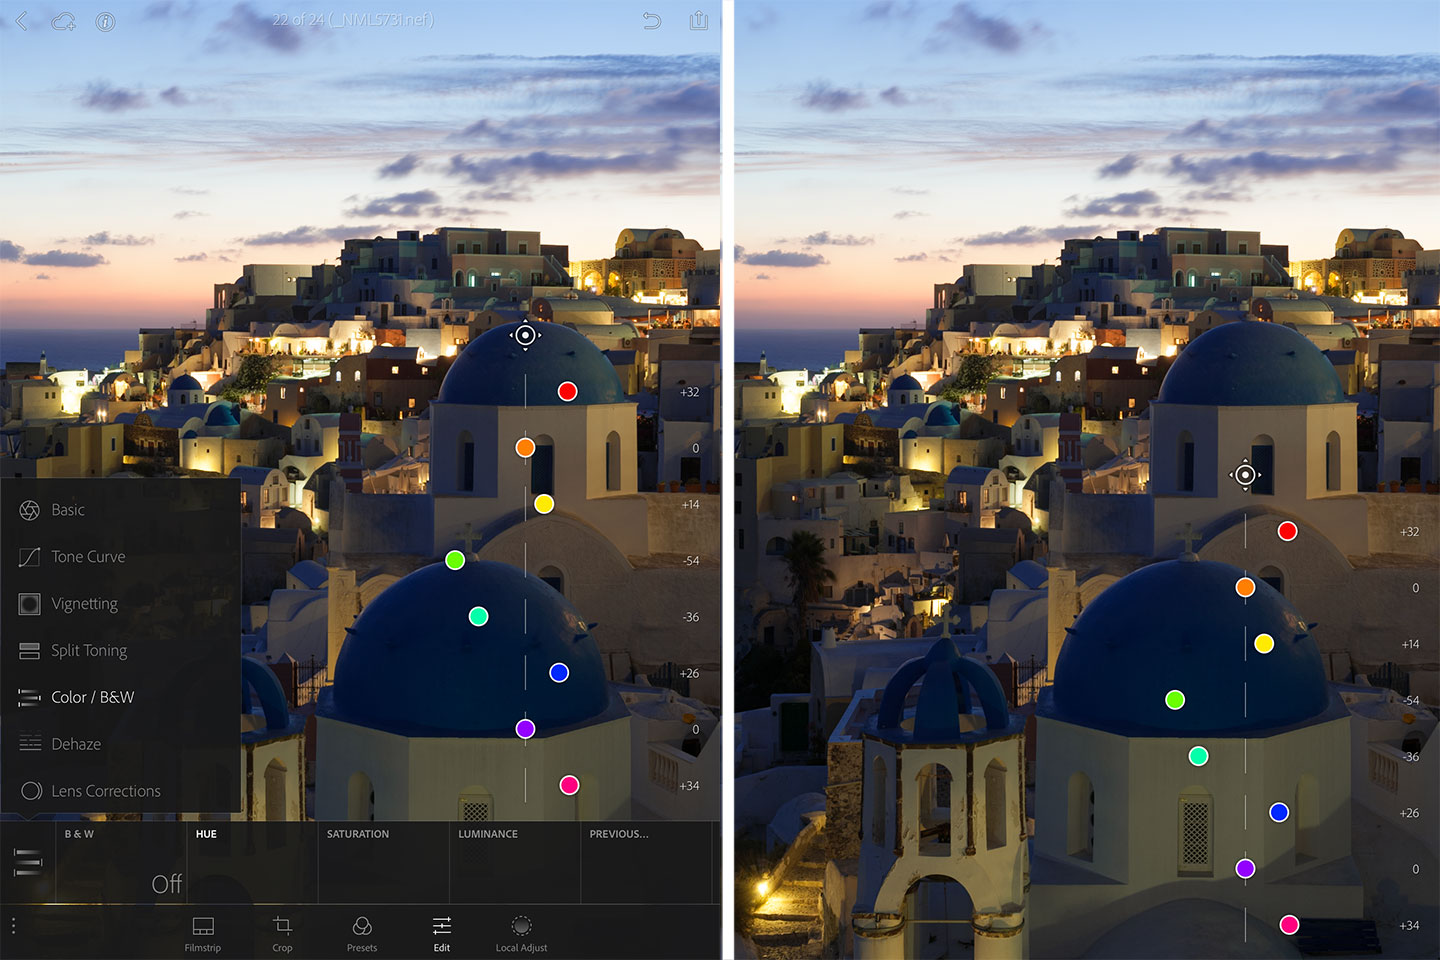
Target Color Adjustments
In the Color / Black & White tool you can make fine tuned adjustments to the colors of the image. You can manipulate the hue, saturation, and luminance with a very intuitive interface. As with all of the other tools, you can hide the main interface by tapping the screen. This gives you the entire mobile device screen area to work on without obstruction.
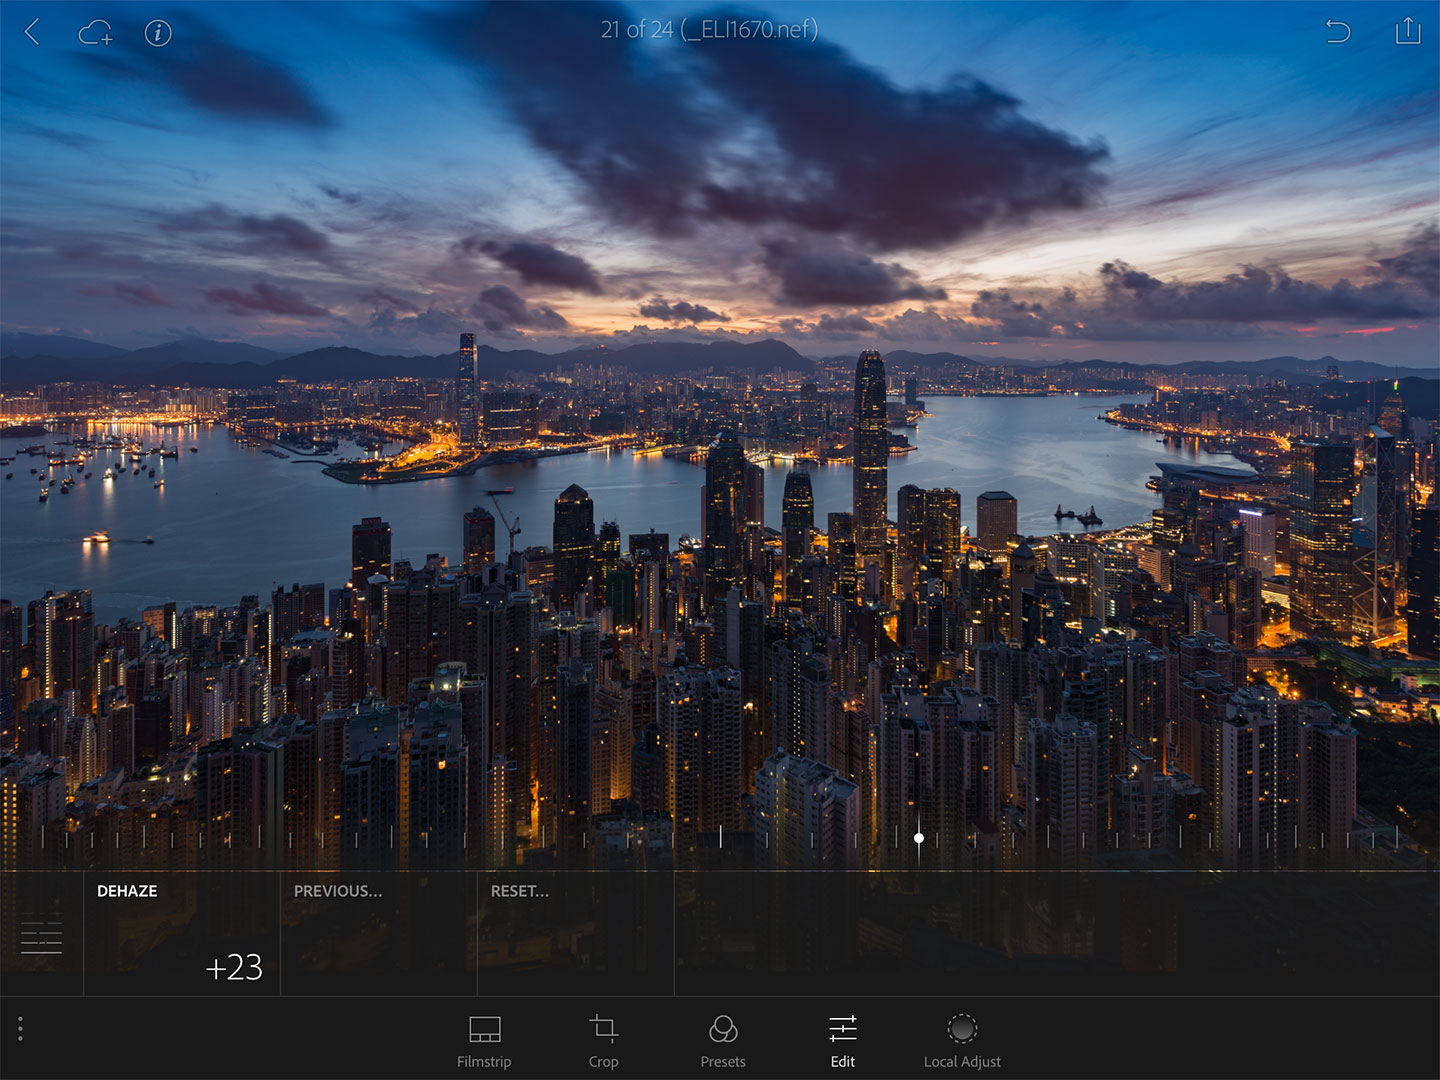
Dehaze
I have to admit, I find myself using the dehaze slider very often because it helps me create incredibly dramatic contrast to my images. It’s awesome to see it built into Adobe Lightroom Mobile as well!
")
(Camera: Nikon D810. Raw photo edited using Adobe Lightroom Mobile)
Point mode in Curves
If you want to fine tune your editing even further, you can also access the Tone Curve. Personally, my favorite feature of the tone curve is point mode. Here is where you can add your own points and dramatically change the look of your image.
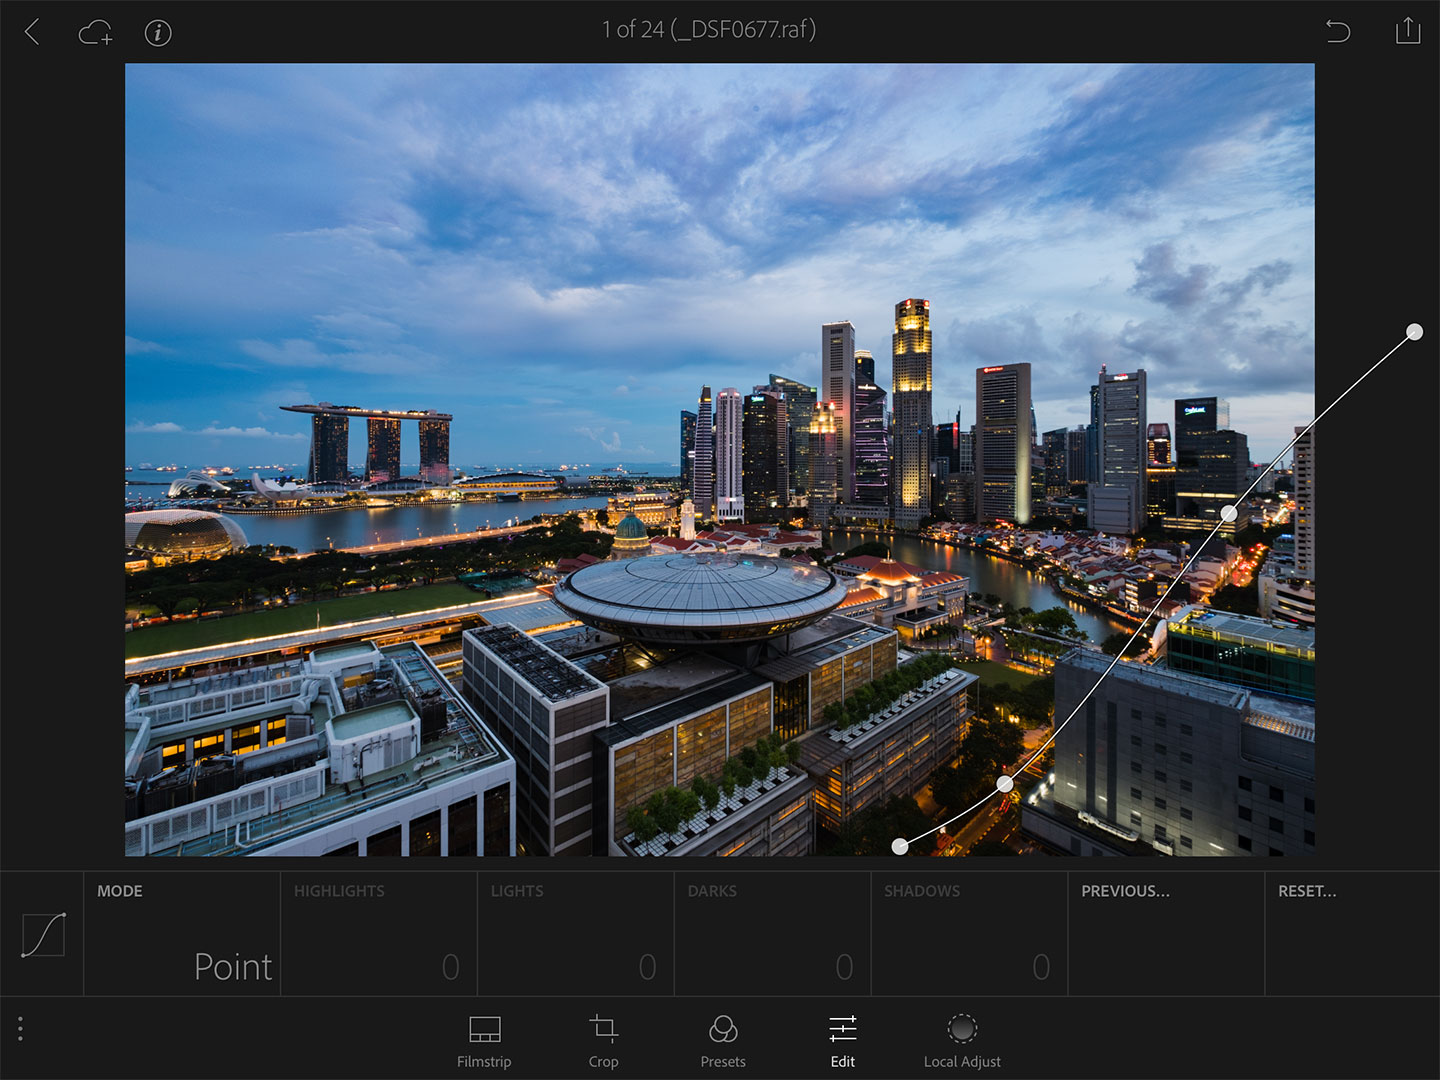

(Camera: Fujifilm X-T2. Raw photo edited using Adobe Lightroom Mobile.)
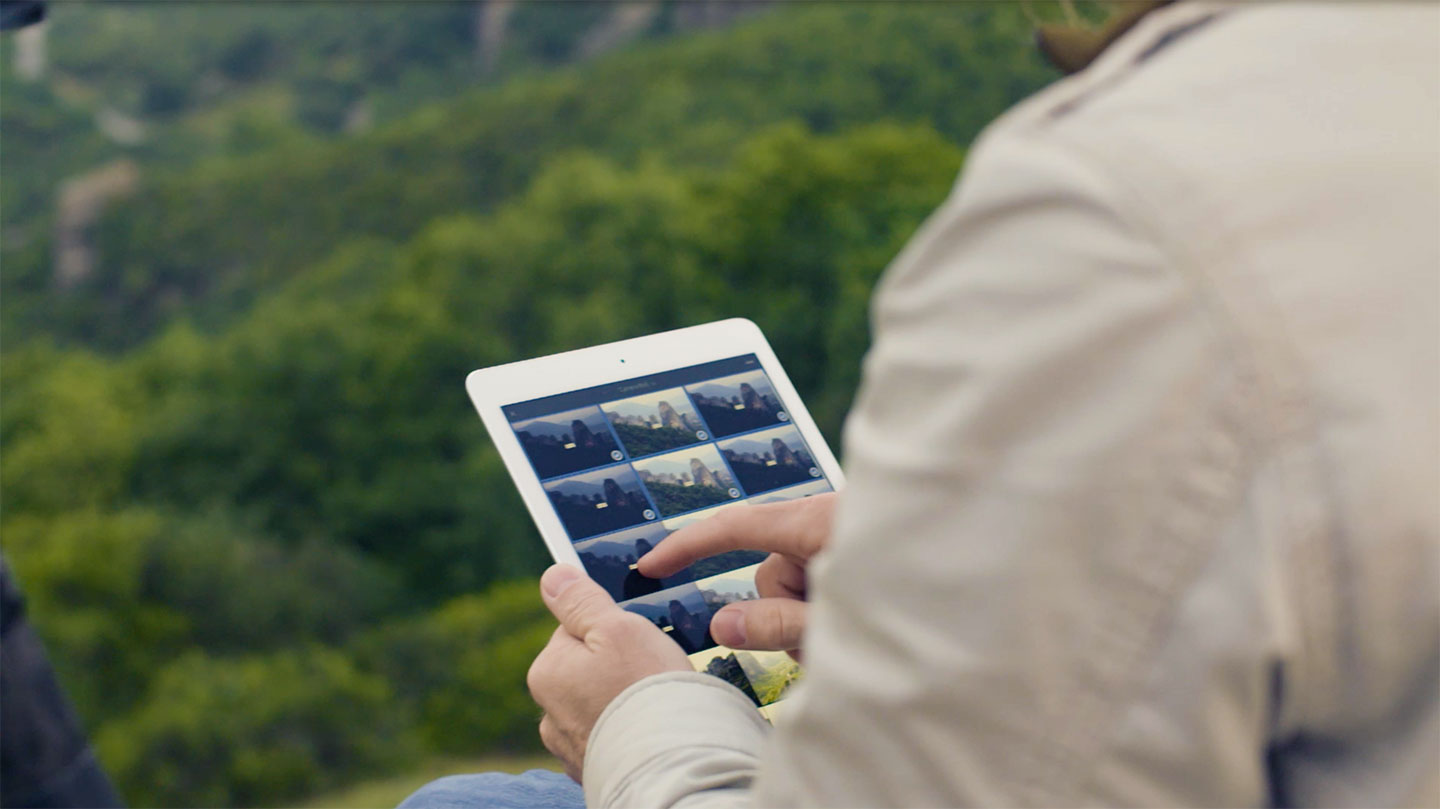
Ratings
The ratings option is a great feature that makes it fast and easy to start the process of deciding on your favorite images. You have the option to flag or star your selects.
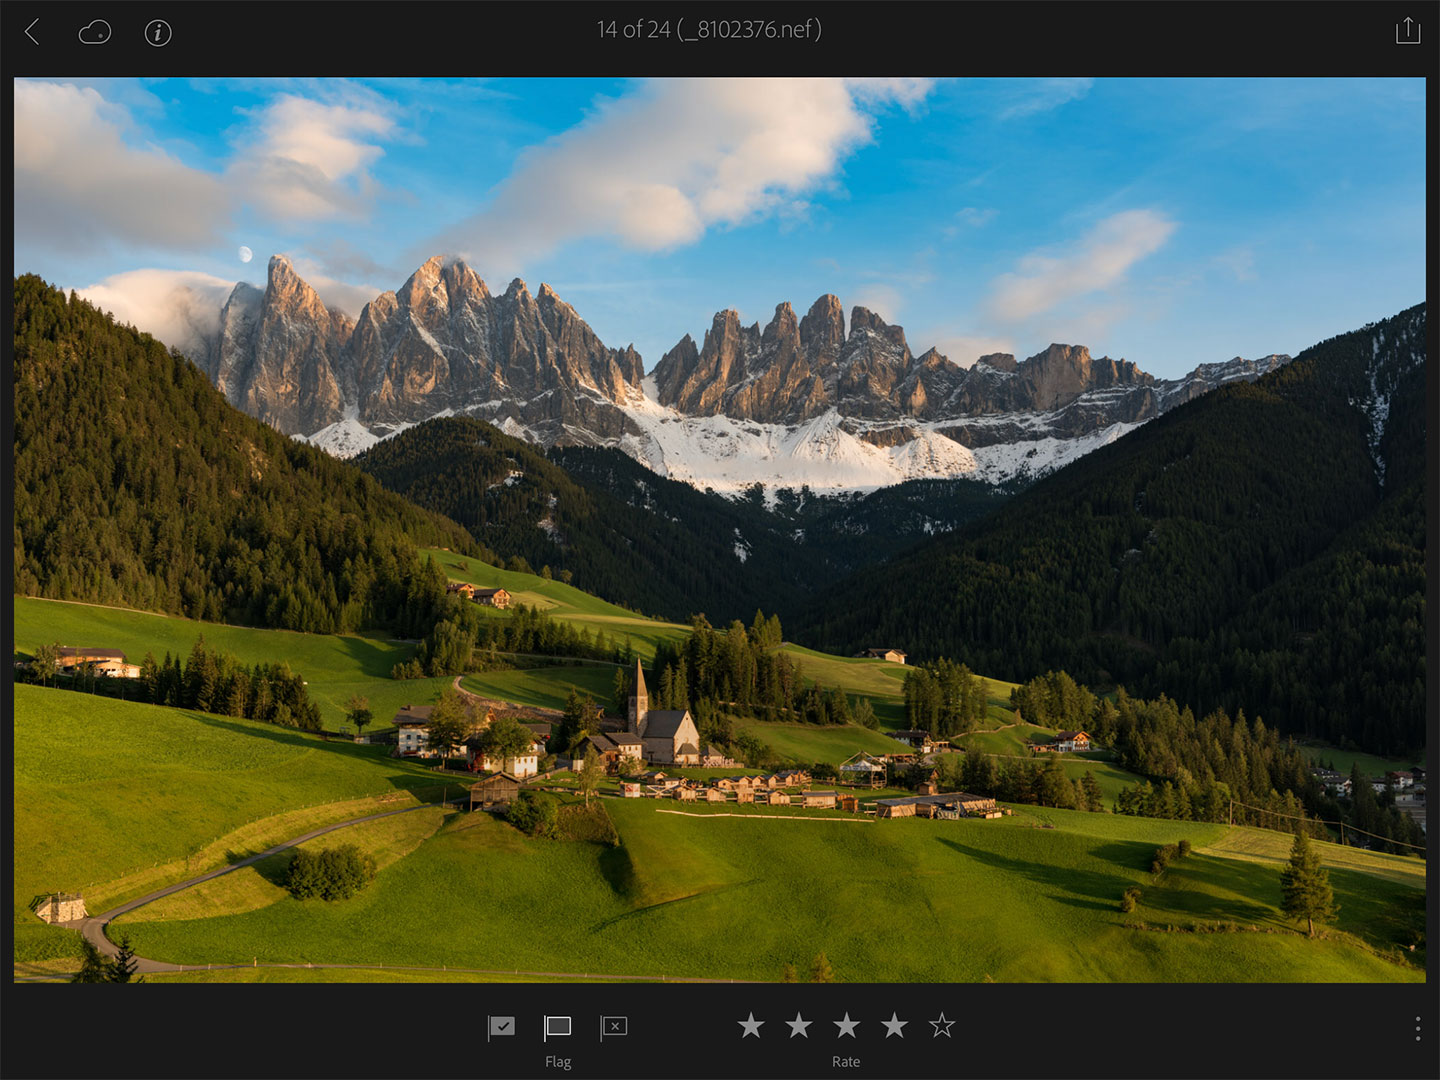

(Camera: Nikon D810. Raw photo edited using Adobe Lightroom Mobile)
Seamless Integration and Syncing of Adobe Lightroom Catalog to All Devices
Syncing your Lightroom catalog across multiple devices isn’t a new thing, but being able to seamlessly edit and sync your raw images starting on mobile and then finishing on your desktop is a powerful new feature. I should mention that in order to take advantage of this new feature, you have to go beyond the free Lightroom Mobile app and have a paid Adobe Creative Cloud subscription. But for less than $10 per month Adobe offers a photographers subscription package, which includes Photoshop and Lightroom for both mobile and desktop, and all of the new syncing features will work.
Enabling syncing is easy. Simply click in the upper left corner of Lightroom and enable the feature. Done!
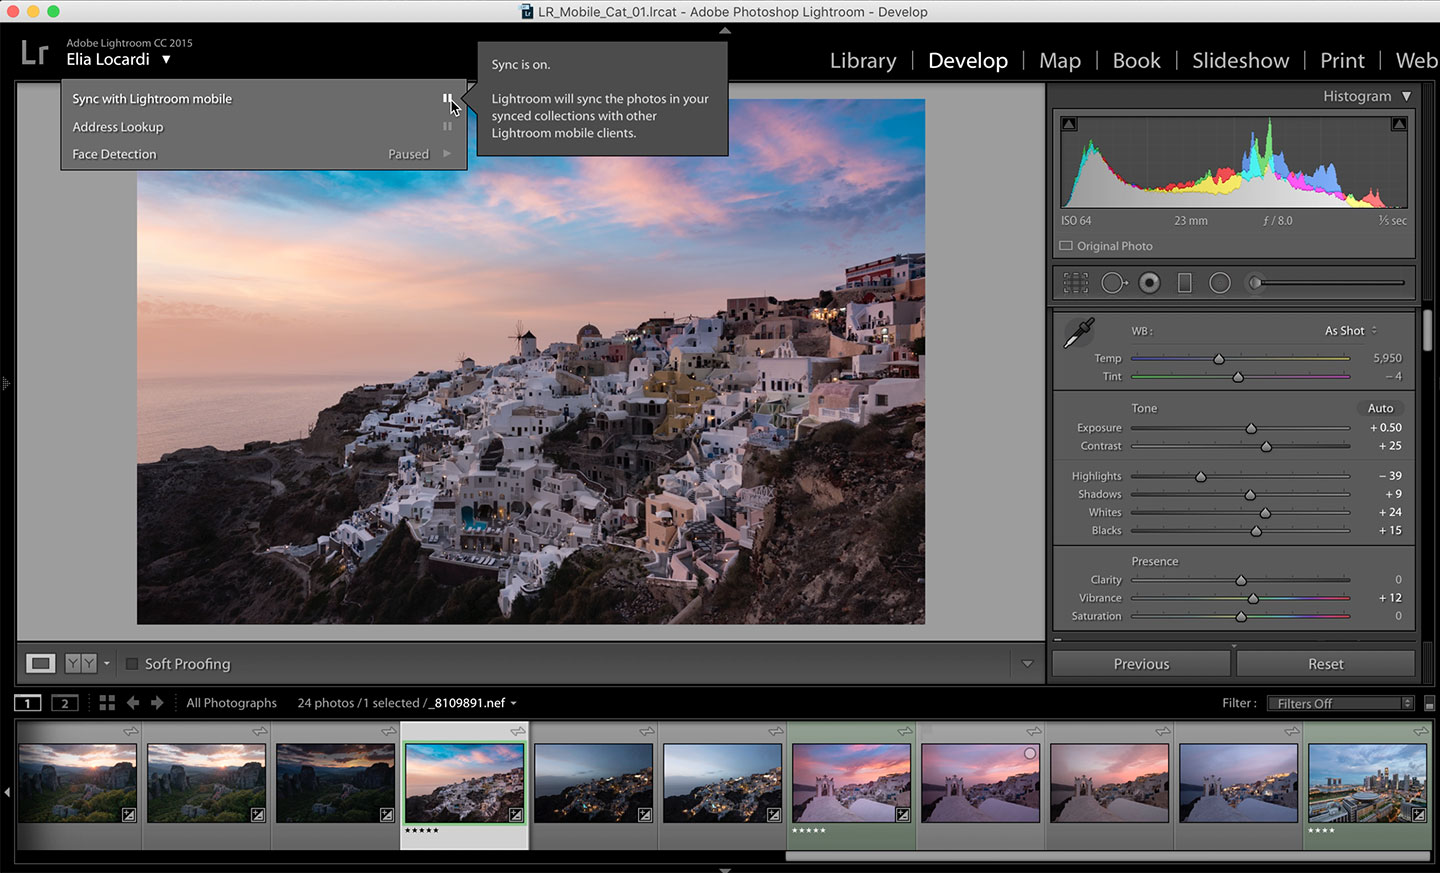
When you import and make raw image adjustments on your Lightroom mobile app, it’s easy to switch back over to Lightroom Desktop and sync your catalog. All of the raw files you imported into Lightroom Mobile, along with every single adjustment you made on mobile, will seamlessly sync to your desktop computer. This of course works in reverse as well. If you make additional adjustments to the images on your desktop, these changes will mirror 100% with your mobile Lightroom catalog.
Important Note: Any edits you make to your images on Lightroom for desktop, regardless of whether the tool is available on Lightroom for mobile, will still update and sync in harmony across all of your devices. You just won’t be able to modify the settings for that specific edit until those tools become available for the Lightroom mobile app.
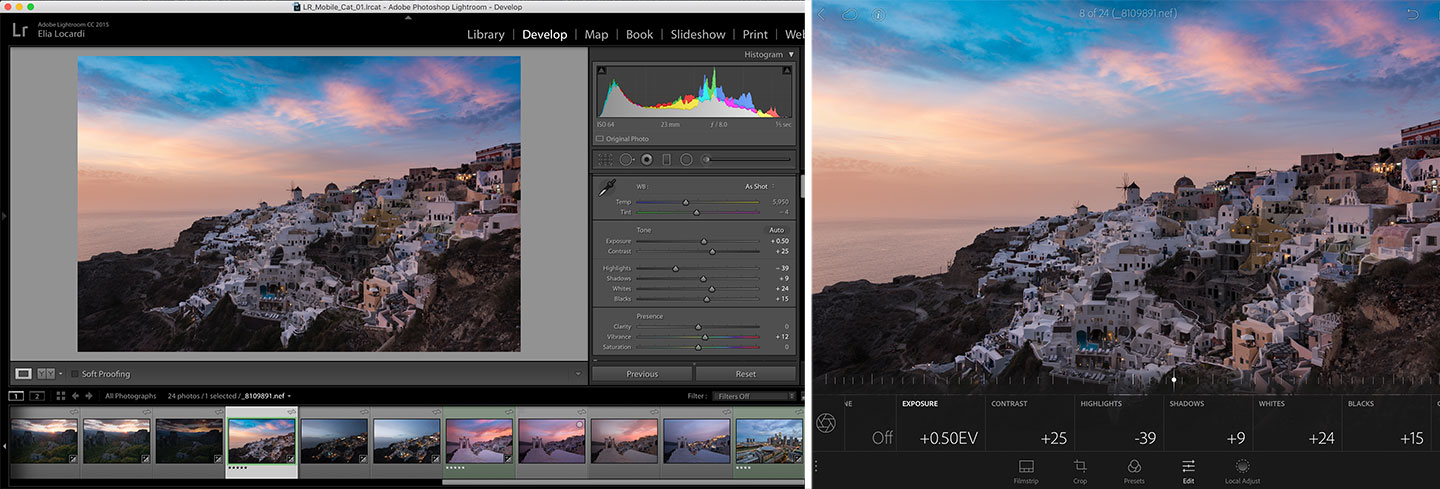
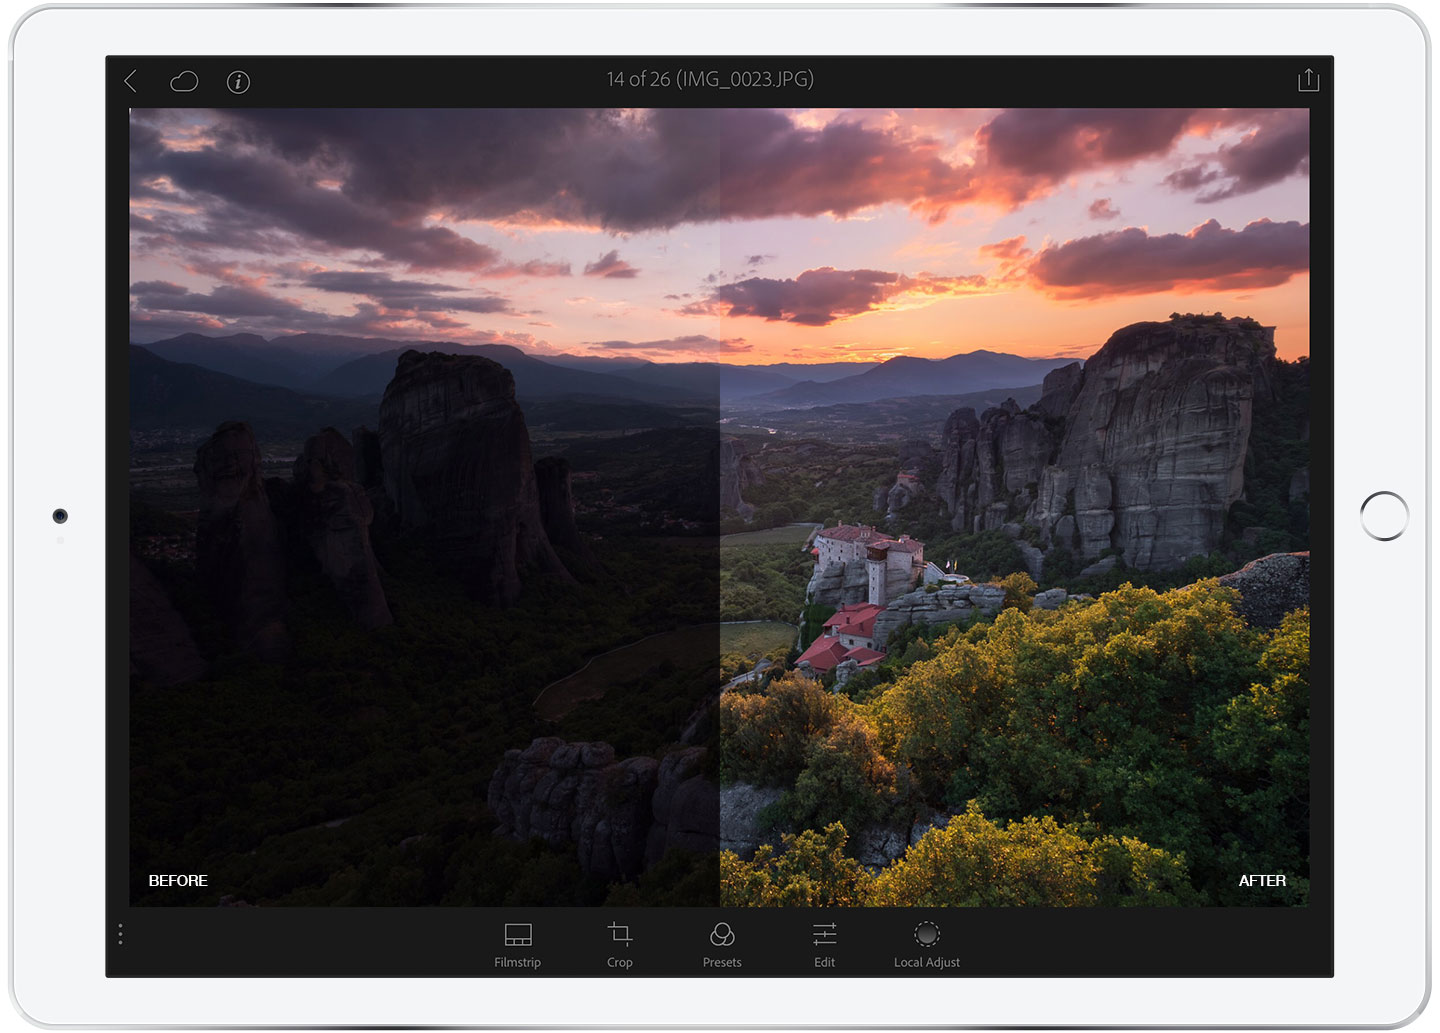
(click image for larger view)
The Results of Working With LR Mobile
Below are some additional before and after examples of images edited with Lightroom mobile (on my iPhone 6s Plus or iPad Pro) over the past two months. Some were captured in Greece specifically for this project, and some are from other locations around the world.
Some of the images were edited solely using Adobe Photoshop Lightroom Mobile, but a few were taken into Photoshop CC for additional editing once back on desktop. For reference, under each Before and After Example, I’ll describe what was used to create the final image.
While I love getting into the technical details of what makes this update to Adobe Photoshop Lightroom Mobile so great, as they say “a picture is worth a thousand words.”

(Camera: Fujifilm X-T2. Raw photo edited using Adobe Lightroom Mobile.)

(After Editing in Lightroom Mobile, additional blending was done in Photoshop. A technique I call “Moments in Time”)

(Camera: Fujifilm X-T2. Raw photo edited using Adobe Lightroom Mobile.)

(After Editing in Lightroom Mobile, additional blending was done in Photoshop. A technique I call “Moments in Time”)
Final thoughts About Working With Lightroom Mobile
In my opinion, it’s one of the most incredible times in history to be a photographer and the tools and technology at our disposal are consistently being improved. Adobe has really pushed the boundaries of mobile image editing with these new Lightroom updates and I’m sure they will continue evolving what’s possible using mobile devices.
With the basic raw and selective adjustments, dehaze feature, points options in curves, and seamless mobile to desktop syncing, they are already changing the way photographers can edit and share their work while on the go. Does that mean I’m ready to switch my workflow over to mobile editing entirely, travel with an iPad only and leave my laptop behind? At this point, the honest answer is not yet.
What I will say is that with my lifestyle of full-time location independent travel, it has been fantastic to be able to incorporate these raw editing mobile tools into my existing workflow– increasing my capacity to be productive no matter where in the world I happen to be. I’m confident that these tools will continue to change the way pro photographers work and, with full raw support, Adobe has made a giant leap in the progression of mobile photography. I’m extremely excited about adding this new mobile raw functionality to my workflow and can’t wait to see what comes next!
If you have any questions, feel free to post them in the comments below or hit me up on social media.


