As photographers, do you think we create our own luck? By placing ourselves in the right place at the right time, do we create our own opportunities for success or are we simply ruled by earthly variables like the weather? And most importantly, does my reverse naked raindance actually work?
Sadly, no matter how fun and visually mesmerizing my naked raindance may be, I’m fairly sure it’s not altering the weather. However, I do believe that it’s these uncontrollable variables that have the potential to create the magic in a photograph and give it that special something. And while we can’t control certain variables, we can learn to understand and recognize them.
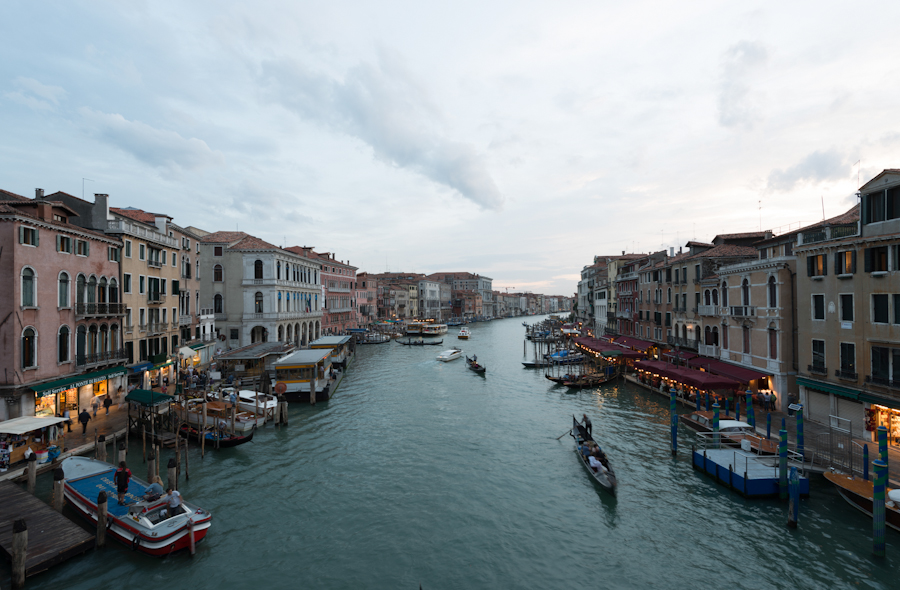
I’ve been lucky enough to visit Venice quite a few times and each time I’m always looking for the perfect amount of variables to line up, especially in places like The Rialto Bridge and views down The Grand Canal. The boat and gondola traffic, the clouds, the light, the turbulence of the water, the restoration projects and scaffolding – getting all these things to work together in harmony can be tricky business but when it all works out, you can come away with something truly unique. This is probably what compels me to visit Venice year after year; that pursuit of that one magic shot. Well, it’s either that or the abundance of amazing (and cheap) pinot grigio.
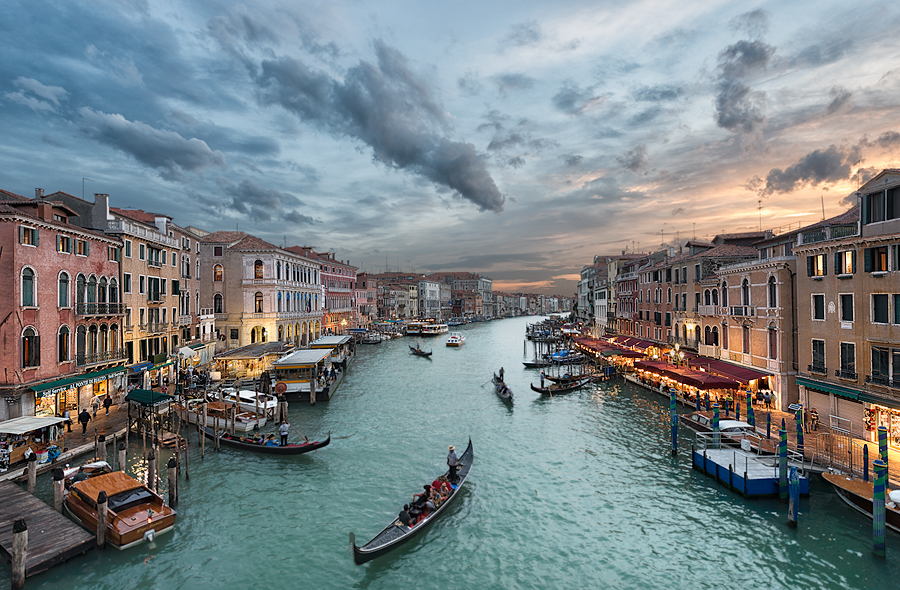
Technical Mumbo Jumbo | Before and After Comparison
Camera: Nikon D800
Lens: 14-24 f/2.8 (Shot at 17 mm)
Tripod: RRS TVC-33 / BH-55 Ballhead / RRS L-Plate
ISO: 100 – 400
4 Exposures at f/8, 1 Exposure at f/6.3, and 2 Exposures at f/2.8
Hardware: 15” 2011 Macbook Pro, Wacom Intuos5 Small Tablet
Software: Lightroom, Photoshop, NIK Software
Technique and Details: Dynamic Blending using 4 bracketed exposures and 3 manual exposures, shot at different times over the course of 30 minutes. The aperture and ISO settings were changed on the fly to compensate for moving objects and fading light. With shooting, the tricky bit was keeping the mob of people from bumping into my tripod since The Rialto Bridge is one of the busiest places in Venice.
In Photoshop—with the help of my Wacom Tablet—I was able to manually blend in the exposures together using hand painted masks. I started with a base of exposures 0 and +1 before brushing in the sky with a blend of exposures -1 and -2 for. Using more hand painted masks, I then brushed in the 2 separate f/2.8 exposures to create the water. Lastly, I brushed in one more exposure at f/6.3—shot 15 minutes later—adding the lighting on the buildings.
Espresso: A lot of it! Thankfully, I packed accordingly.
